

Authentication
How the Backend MCP Server authenticates AI clients with OAuth2 through Nhost Auth, including CIMD, the consent page, discovery endpoints, and JWT forwarding.
MCP authentication OAuth2 OIDC PKCE CIMD JWT JWKS consent page discoveryThe Backend MCP Server integrates with Nhost Auth as an OAuth2 authorization server, following the MCP Authorization specification. Any MCP client that supports OAuth2 can authenticate against your Nhost project automatically — you do not register clients by hand.
Prerequisites
Section titled “Prerequisites”Before the flow works end to end, your Nhost Auth project needs:
-
Enable OAuth2 Provider
Backend MCP relies on Nhost Auth acting as an OAuth2 authorization server. Enable it and configure an RSA signing key.
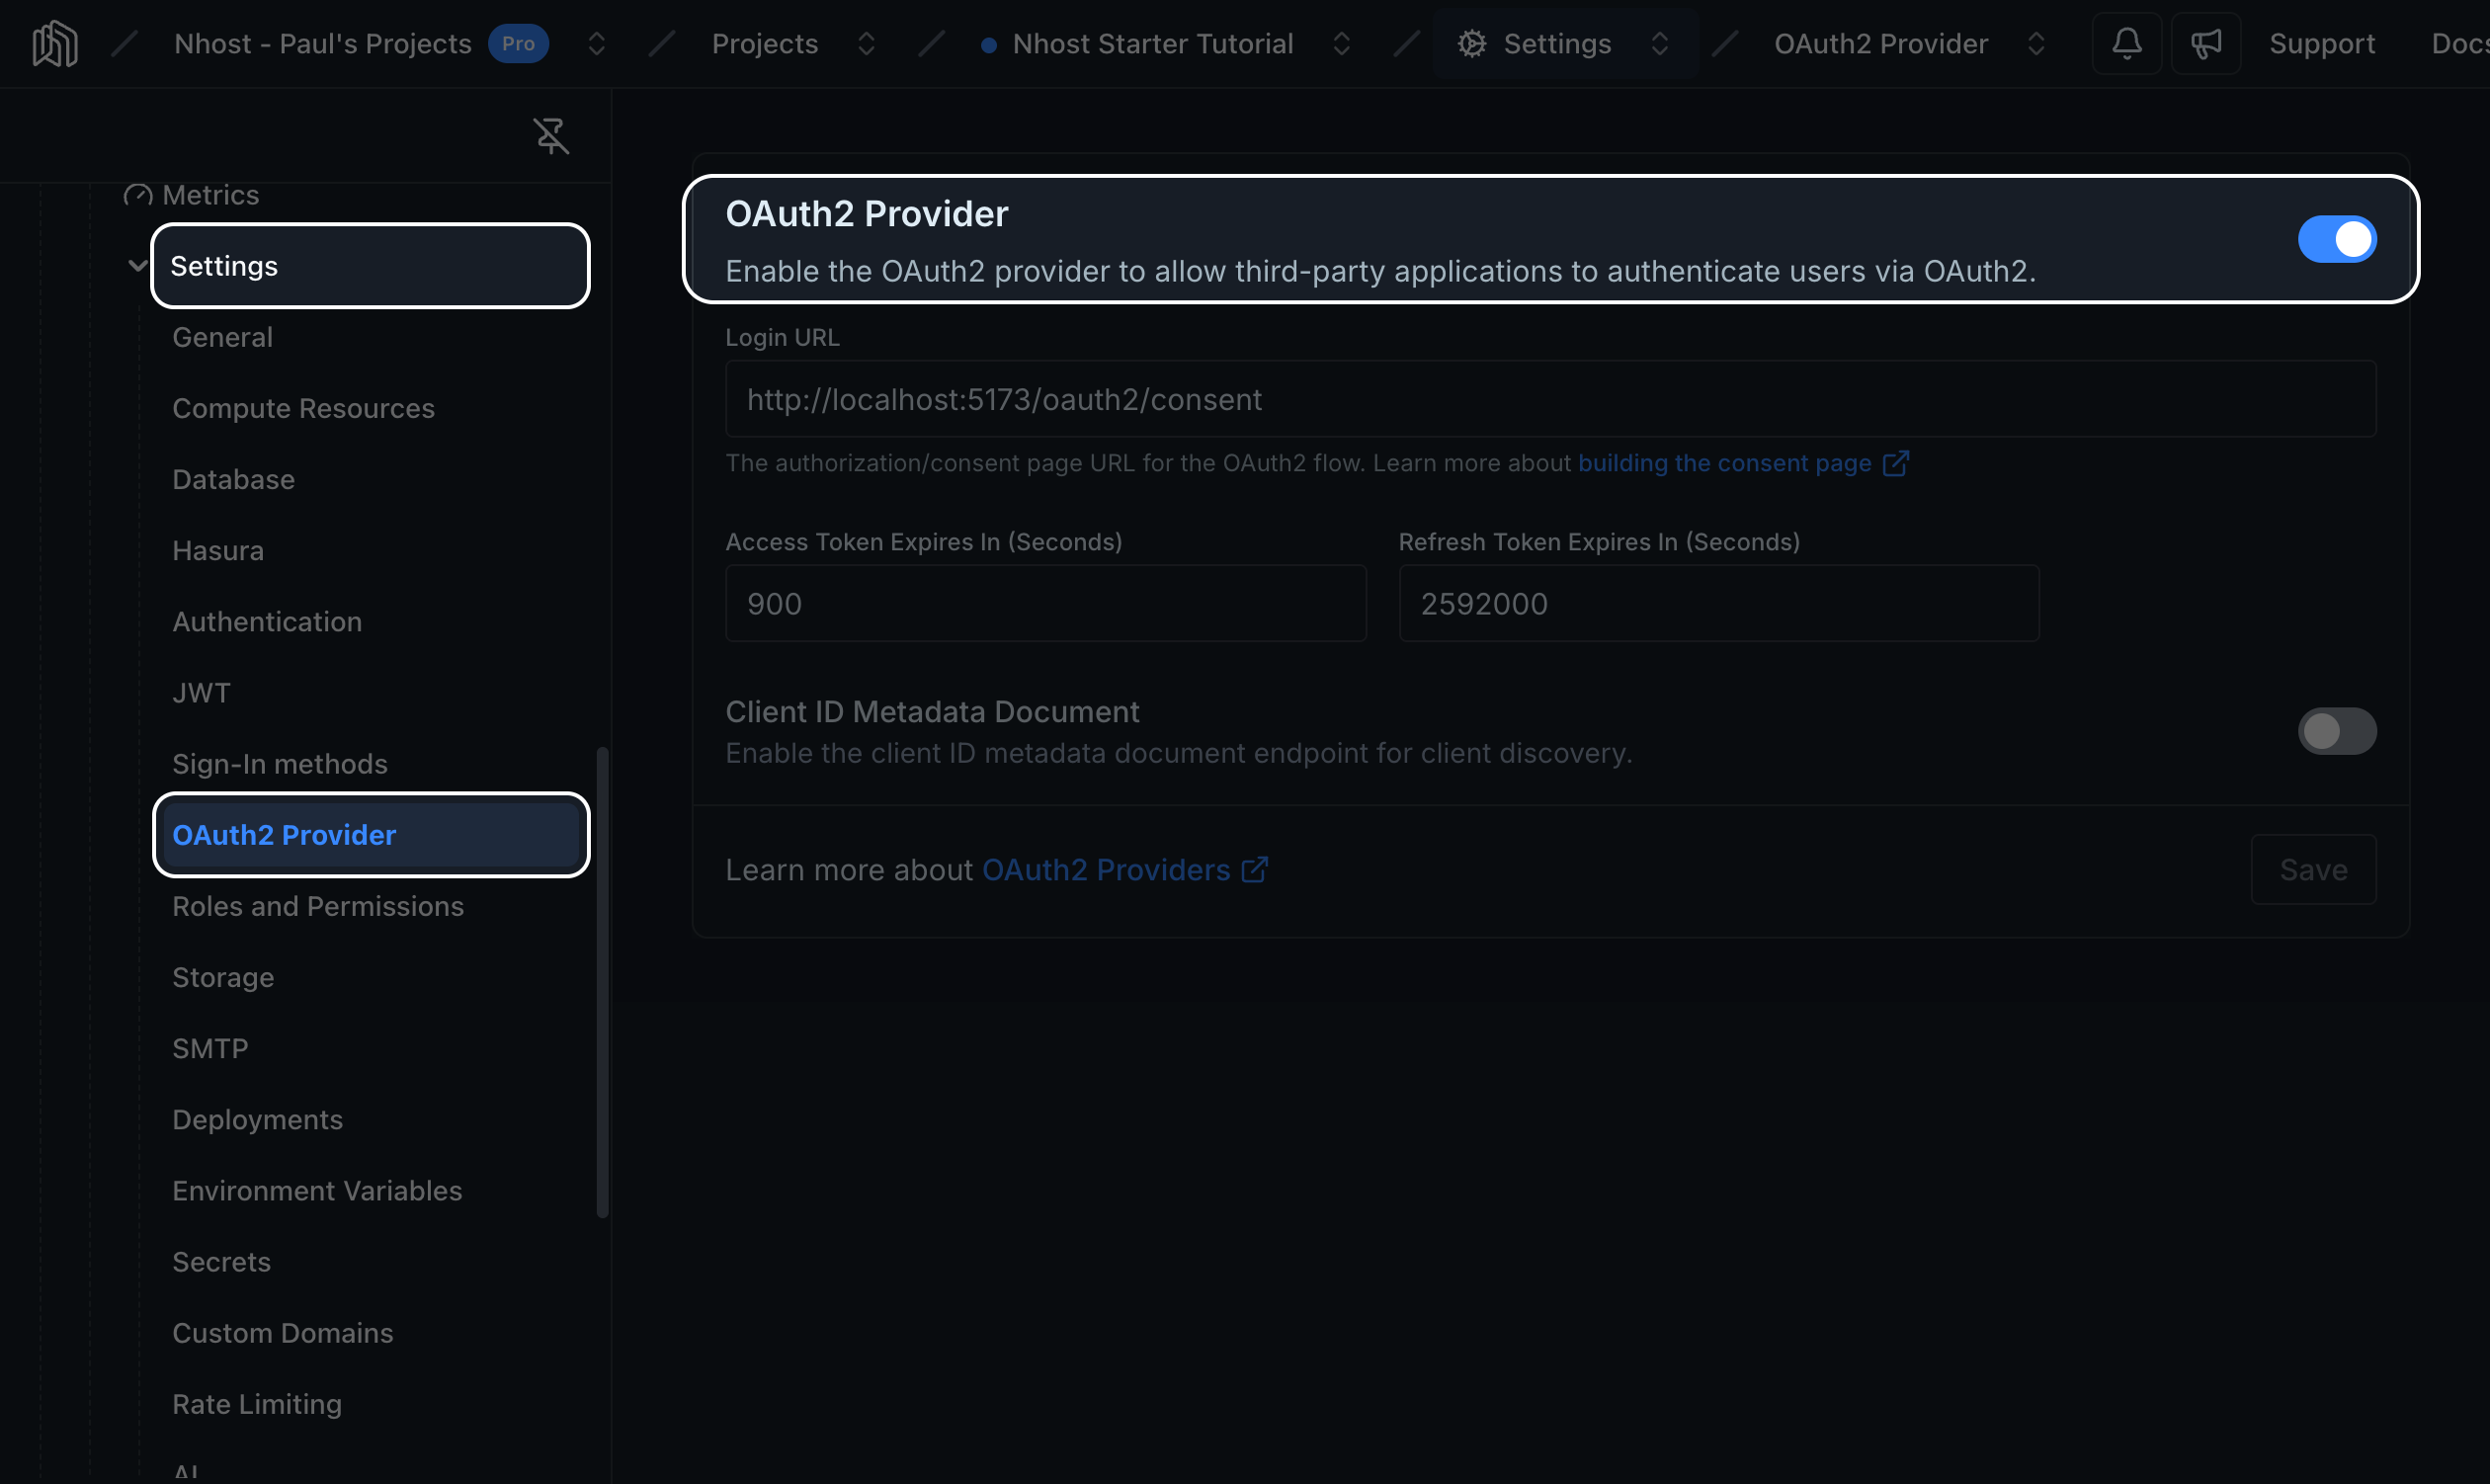
Learn more: OAuth2 / OIDC Provider
-
A Consent Page
After enabling OAuth2, you must add a Login URL for a consent page. If you need tips on building a consent page, check out our consent page guide.
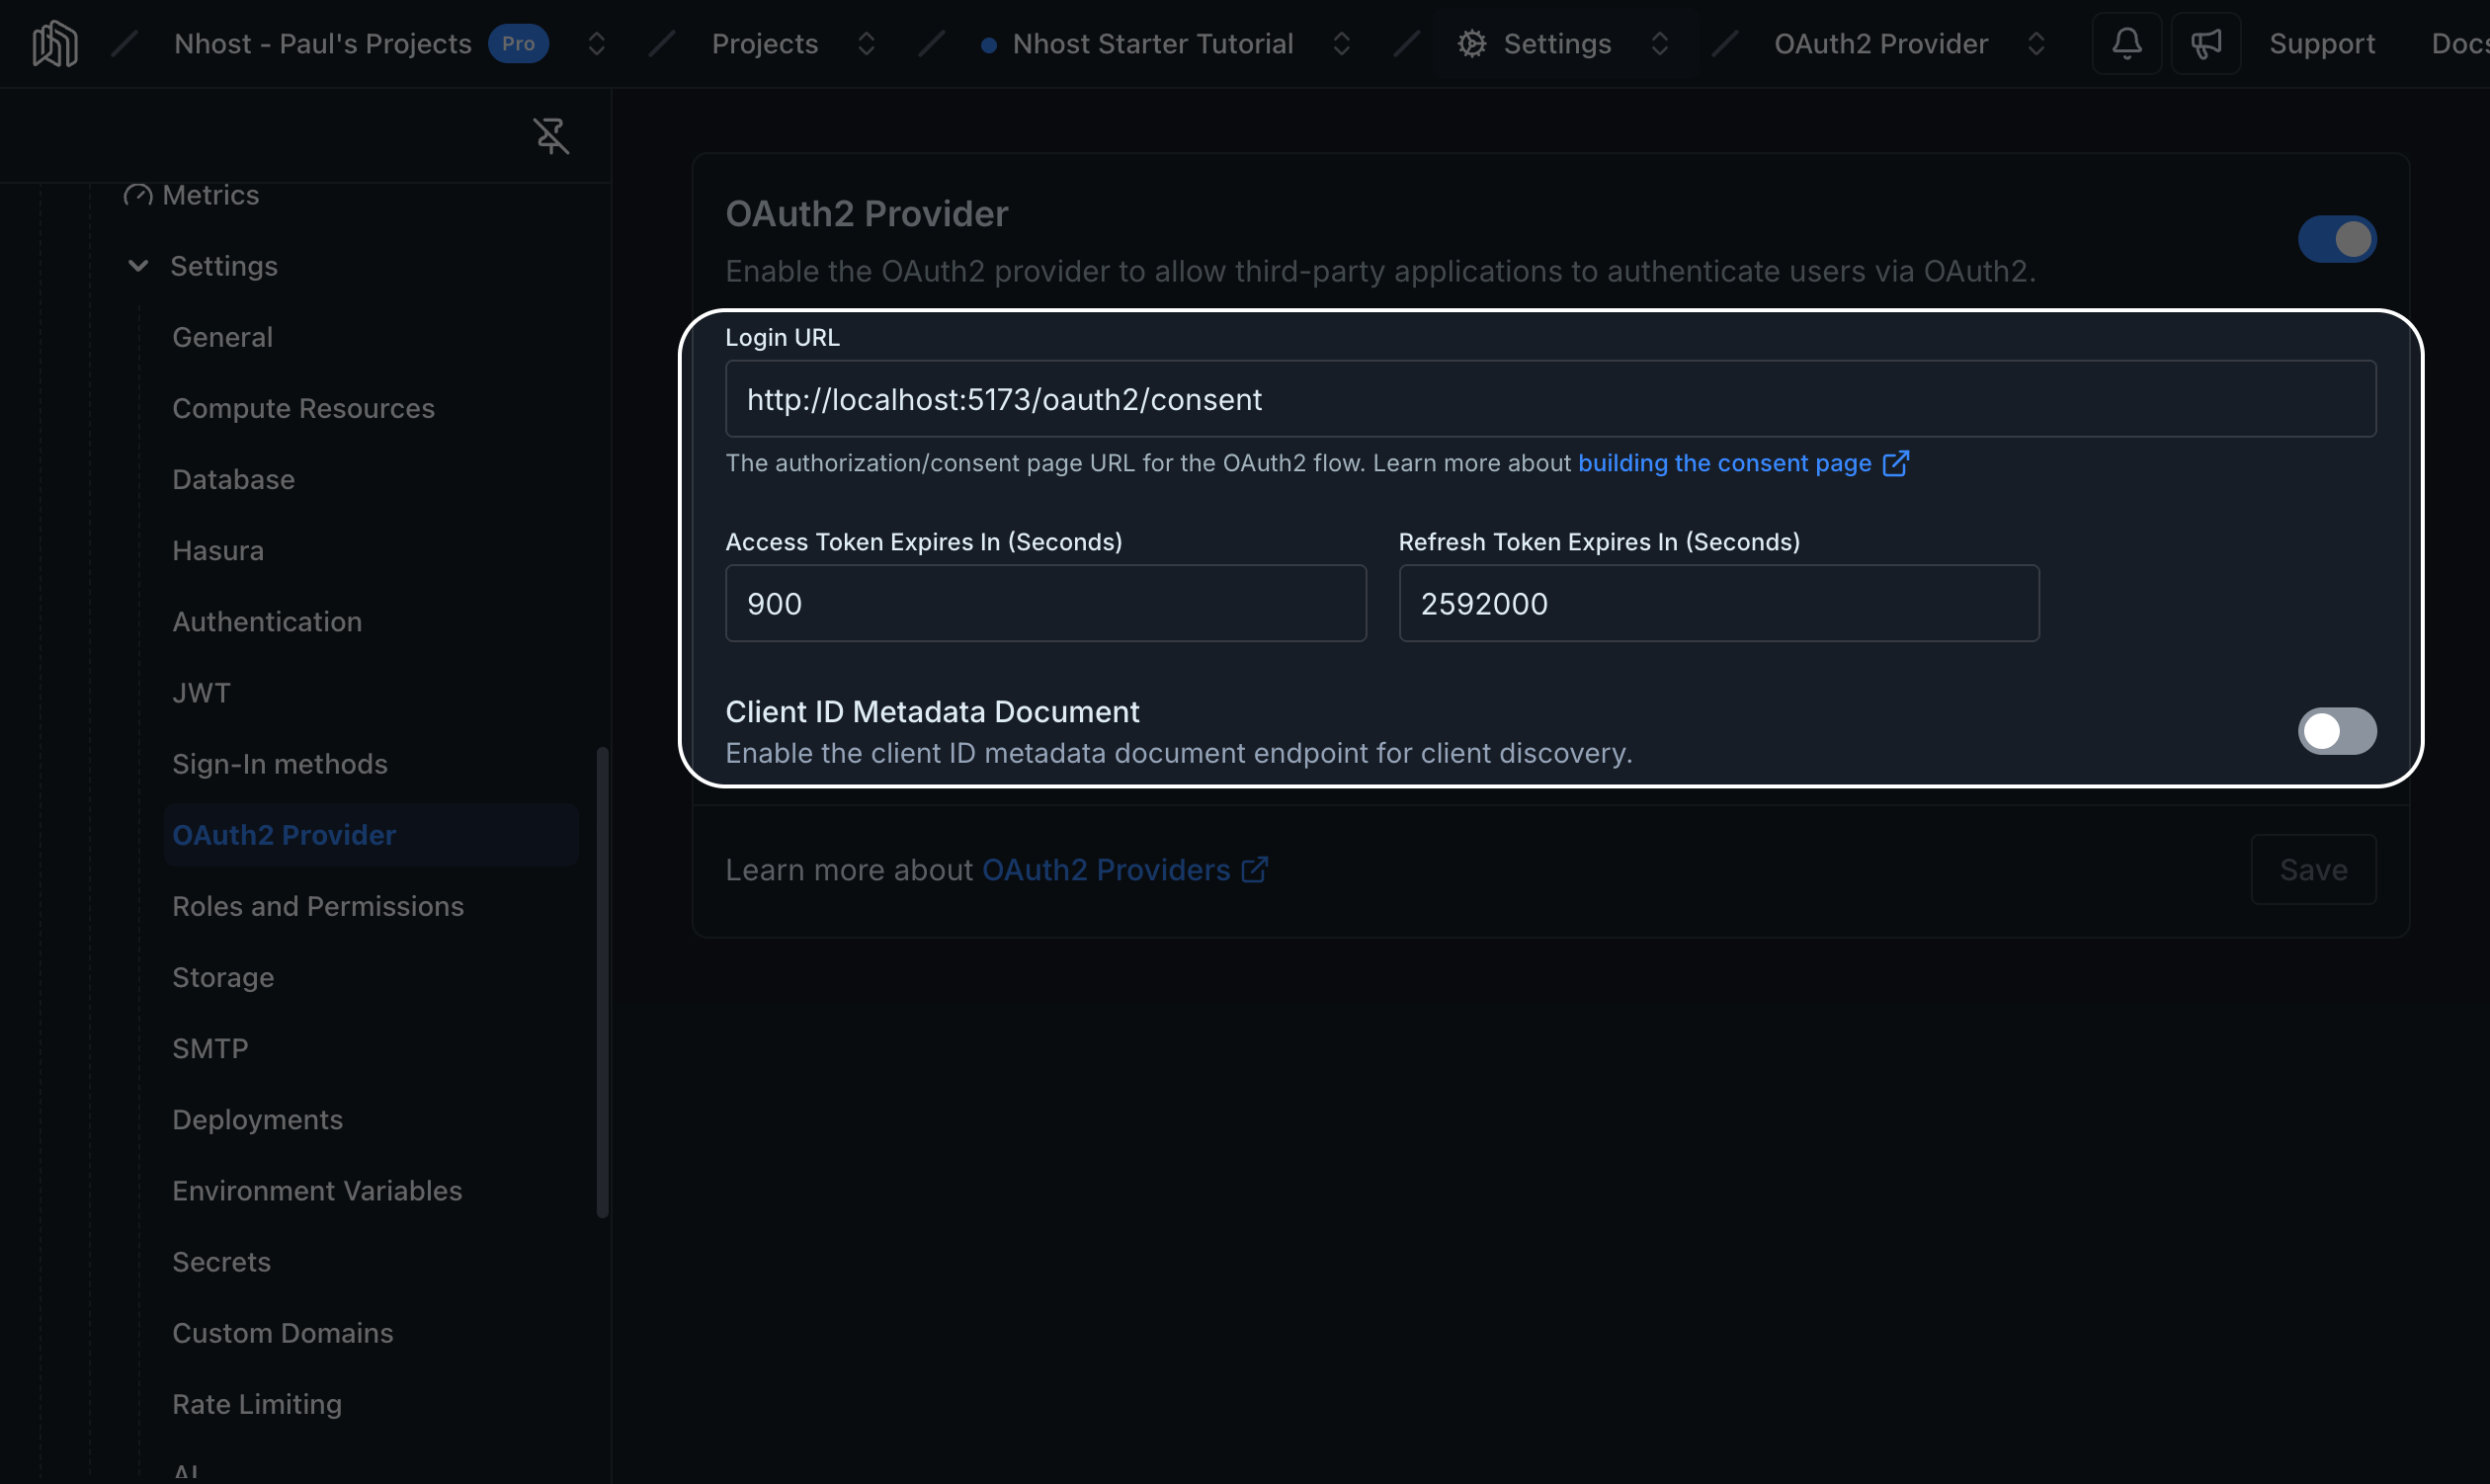
Below Login URL, you can optionally change the default expiration values for Access and Refresh tokens.
-
Enable CIMD
MCP clients register themselves dynamically using a Client ID Metadata Document (CIMD) rather than a pre-created client ID and secret. This must be enabled for the flow to work.
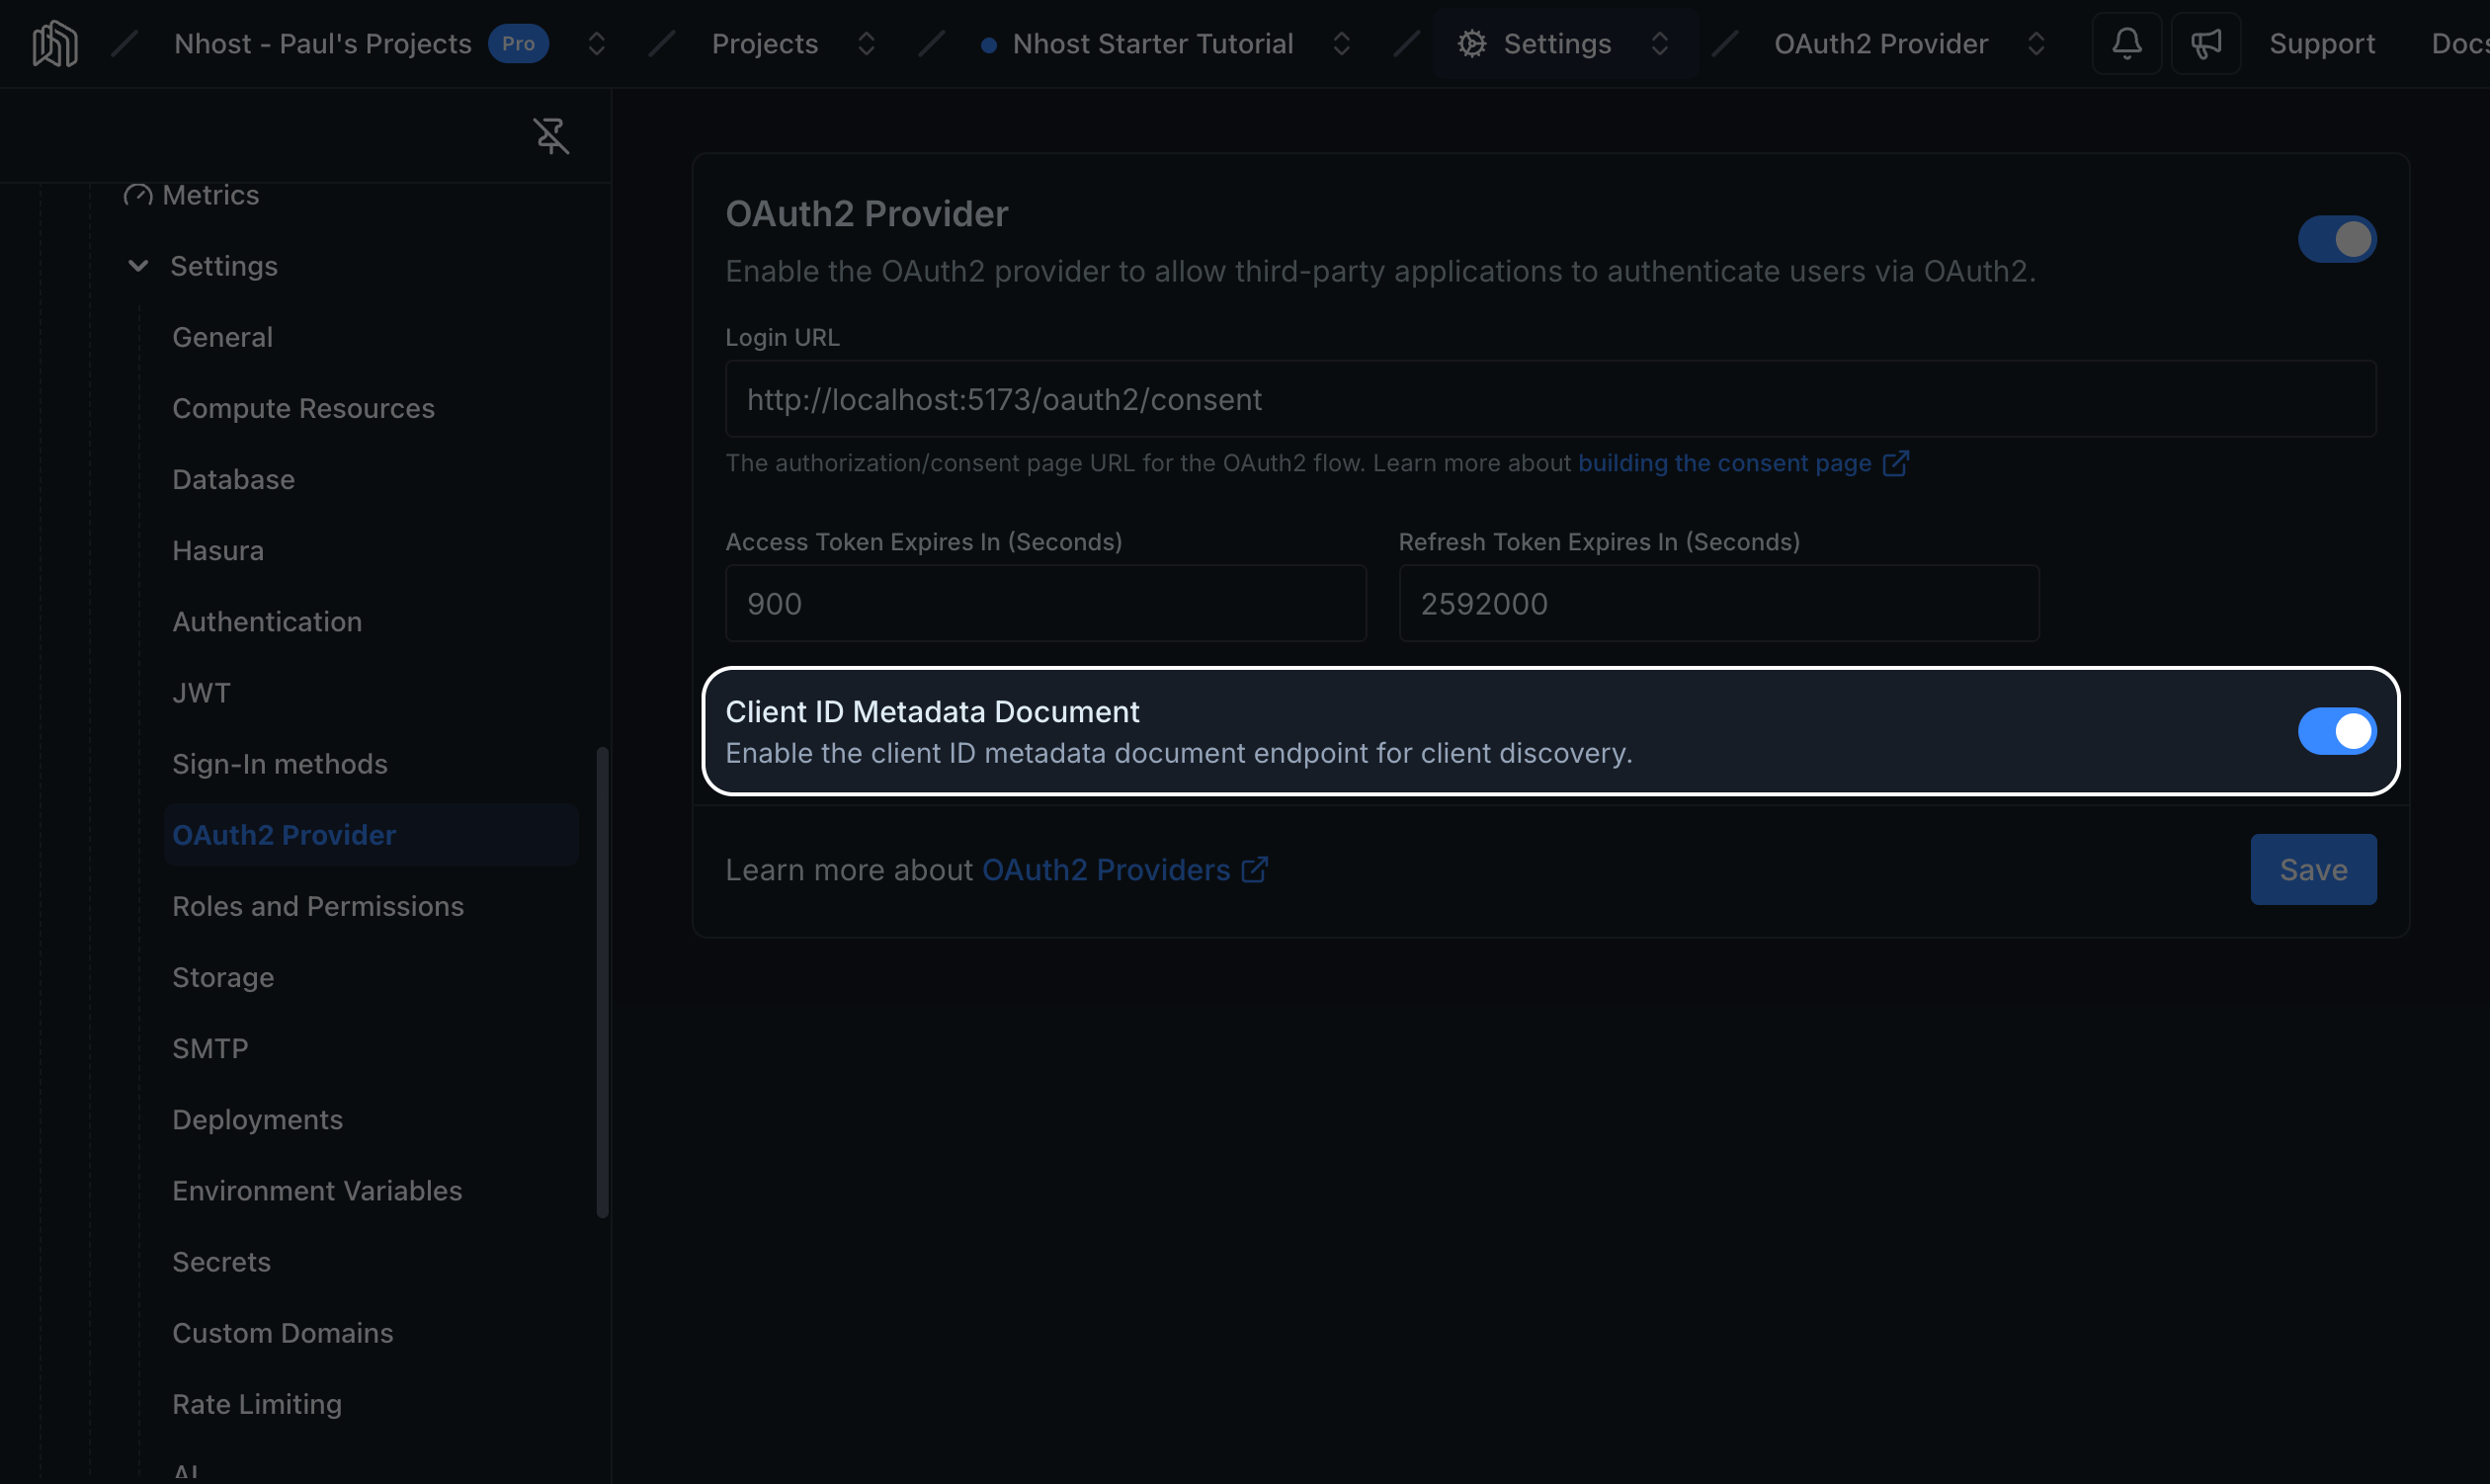 [auth.oauth2Provider]# Enable the OAuth2/OIDC providerenabled = true # default: false[auth.oauth2Provider.clientIdMetadataDocument]# Enable Client ID Metadata Document (CIMD) supportenabled = true # default: false
The flow
Section titled “The flow”sequenceDiagram participant Client as MCP Client participant MCP as Backend MCP participant Auth as Nhost Auth participant Consent as Your Consent Page
Client->>MCP: GET /.well-known/oauth-protected-resource MCP-->>Client: authorization_servers + scopes Client->>Auth: GET /.well-known/oauth-authorization-server Auth-->>Client: endpoints, grant types, PKCE support Client->>Auth: /oauth2/authorize (code flow + PKCE) Auth->>Consent: Redirect for login and approval Consent-->>Auth: User authenticates and authorizes Auth-->>Client: Authorization code Client->>Auth: Exchange code for tokens (PKCE verifier) Auth-->>Client: JWT access token Client->>MCP: MCP request with Authorization: Bearer <JWT> MCP->>MCP: Validate JWT via JWKS MCP-->>Client: Tool results- The MCP client discovers authentication requirements by fetching
/.well-known/oauth-protected-resourcefrom Backend MCP. - It reads the authorization server metadata and redirects the user to the Nhost Auth authorization endpoint, using the authorization code flow with PKCE.
- The user logs in and approves the request on your consent page.
- The client exchanges the authorization code for a JWT access token.
- Every subsequent MCP request carries the JWT as a
Bearertoken. - Backend MCP validates the JWT and forwards it to GraphQL, which enforces permissions based on the token’s claims.
Discovery endpoints
Section titled “Discovery endpoints”Backend MCP serves two well-known documents that let clients bootstrap the flow without manual configuration.
Describes Backend MCP as a protected resource and points to the authorization server.
{ "resource": "https://mcp.acme.com", "authorization_servers": ["https://SUBDOMAIN.auth.REGION.nhost.run/v1"], "scopes_supported": ["openid", "graphql"]}resource is derived from the request’s scheme and host. When Backend MCP runs behind a proxy or load balancer, the scheme is taken from the X-Forwarded-Proto header.
Mirrors the metadata of your Nhost Auth OAuth2 server so clients can find the authorization and token endpoints.
{ "issuer": "https://SUBDOMAIN.auth.REGION.nhost.run/v1", "jwks_uri": "https://SUBDOMAIN.auth.REGION.nhost.run/v1/.well-known/jwks.json", "authorization_endpoint": "https://SUBDOMAIN.auth.REGION.nhost.run/v1/oauth2/authorize", "token_endpoint": "https://SUBDOMAIN.auth.REGION.nhost.run/v1/oauth2/token", "scopes_supported": ["openid", "graphql"], "response_types_supported": ["code"], "grant_types_supported": ["authorization_code", "refresh_token"], "token_endpoint_auth_methods_supported": ["none"], "code_challenge_methods_supported": ["S256"], "client_id_metadata_document_supported": true}Notable values:
token_endpoint_auth_methods_supportedis["none"]— clients are public and use PKCE instead of a client secret.code_challenge_methods_supportedis["S256"]— PKCE with SHA-256 is required.client_id_metadata_document_supportedistrue— clients register via CIMD.
Scopes
Section titled “Scopes”The scopes advertised in the discovery documents depend on whether you enforce a role:
| Configuration | Scopes advertised |
|---|---|
No --enforce-role |
openid, graphql |
--enforce-role=user_mcp |
openid, graphql:role:user_mcp |
The graphql:role:<role> scope requests a token whose default Hasura role is <role>. See Roles & permissions for how enforcement works.
JWT validation
Section titled “JWT validation”On each request Backend MCP:
- Reads the
Authorization: Bearer <token>header. A missing or malformed header results in401 Unauthorized. - Fetches the signing keys from
<auth-url>/.well-known/jwks.json(JWKS) and validates the token’s signature. - Checks that the token’s issuer matches the configured auth URL, that it has not expired, and that it carries an issued-at claim.
- Forwards the same
Authorizationheader to every downstream GraphQL request, so Hasura enforces permissions from the token’s claims.
The WWW-Authenticate challenge
Section titled “The WWW-Authenticate challenge”When a request is unauthorized, Backend MCP returns a 401 with a WWW-Authenticate header that points clients back to the resource metadata, so they can (re)start the flow:
WWW-Authenticate: Bearer realm="https://mcp.acme.com", resource_metadata="https://mcp.acme.com/.well-known/oauth-protected-resource"The realm value comes from the --realm flag. Set it to the public URL of your Backend MCP Server.
Next steps
Section titled “Next steps”- Roles & permissions — restrict what the assistant can do with a dedicated role.
- Connecting clients — point Claude, Cursor, and others at Backend MCP.