

Actions
Extend your GraphQL API with custom queries and mutations backed by webhooks
Actions GraphQL custom mutations custom queries webhooks business logic REST wrapperActions let you extend your GraphQL API with custom queries and mutations that are resolved by an HTTP webhook you host. You define the GraphQL types, point the field at a handler URL, and the GraphQL engine forwards the input to your handler and returns the typed result. This is how you add custom business logic, call third-party services, or wrap an existing REST endpoint in your GraphQL schema.
Actions are stored in your project’s metadata, so they deploy the same way as your other metadata. Managing Actions in the dashboard requires a project admin secret.
Use Cases
Section titled “Use Cases”- Custom business logic: run logic that isn’t a plain database operation, such as processing a payment or fulfilling an order.
- Third-party integrations: call an external API and return the result as a typed GraphQL field.
- Server-side validation: validate or enrich input before it reaches your database.
- Wrapping REST endpoints: expose an existing REST service through your GraphQL API. Pair Actions with Functions to host the handler on Nhost.
How Actions Work
Section titled “How Actions Work”When a client calls an Action, the GraphQL engine forwards the request to your webhook handler and returns the handler’s response typed as the Action’s output type.
sequenceDiagram actor C as Client participant G as GraphQL Engine participant H as Webhook Handler C->>G: mutation { processPayment(input: {...}) { ... } } G->>H: POST payload (input + session variables) H->>H: Run custom logic H-->>G: JSON response G-->>C: Typed responseThe handler receives a JSON payload containing the Action’s input arguments, the caller’s session variables, and the raw GraphQL request, and returns a JSON body that matches the output type.
{ "action": { "name": "processPayment" }, "input": { "input": { "orderId": "ord_123", "amount": 49.99, "currency": "USD" } }, "request_query": "mutation { processPayment(input: {orderId: \"ord_123\", amount: 49.99, currency: \"USD\"}) { transactionId status } }", "session_variables": { "x-hasura-role": "user", "x-hasura-user-id": "3b9f1de2-7c1a-4f0e-9b6d-2a45c8e1f7a0", "x-hasura-user-is-anonymous": "false" }}To report an error, the handler responds with a 4xx status code and a JSON body containing a message field. The message is returned to the client as a GraphQL error.
Creating an Action
Section titled “Creating an Action”You can create an Action in the dashboard, or declaratively by editing your project’s metadata files. Both produce the same result.
-
Create a new Action
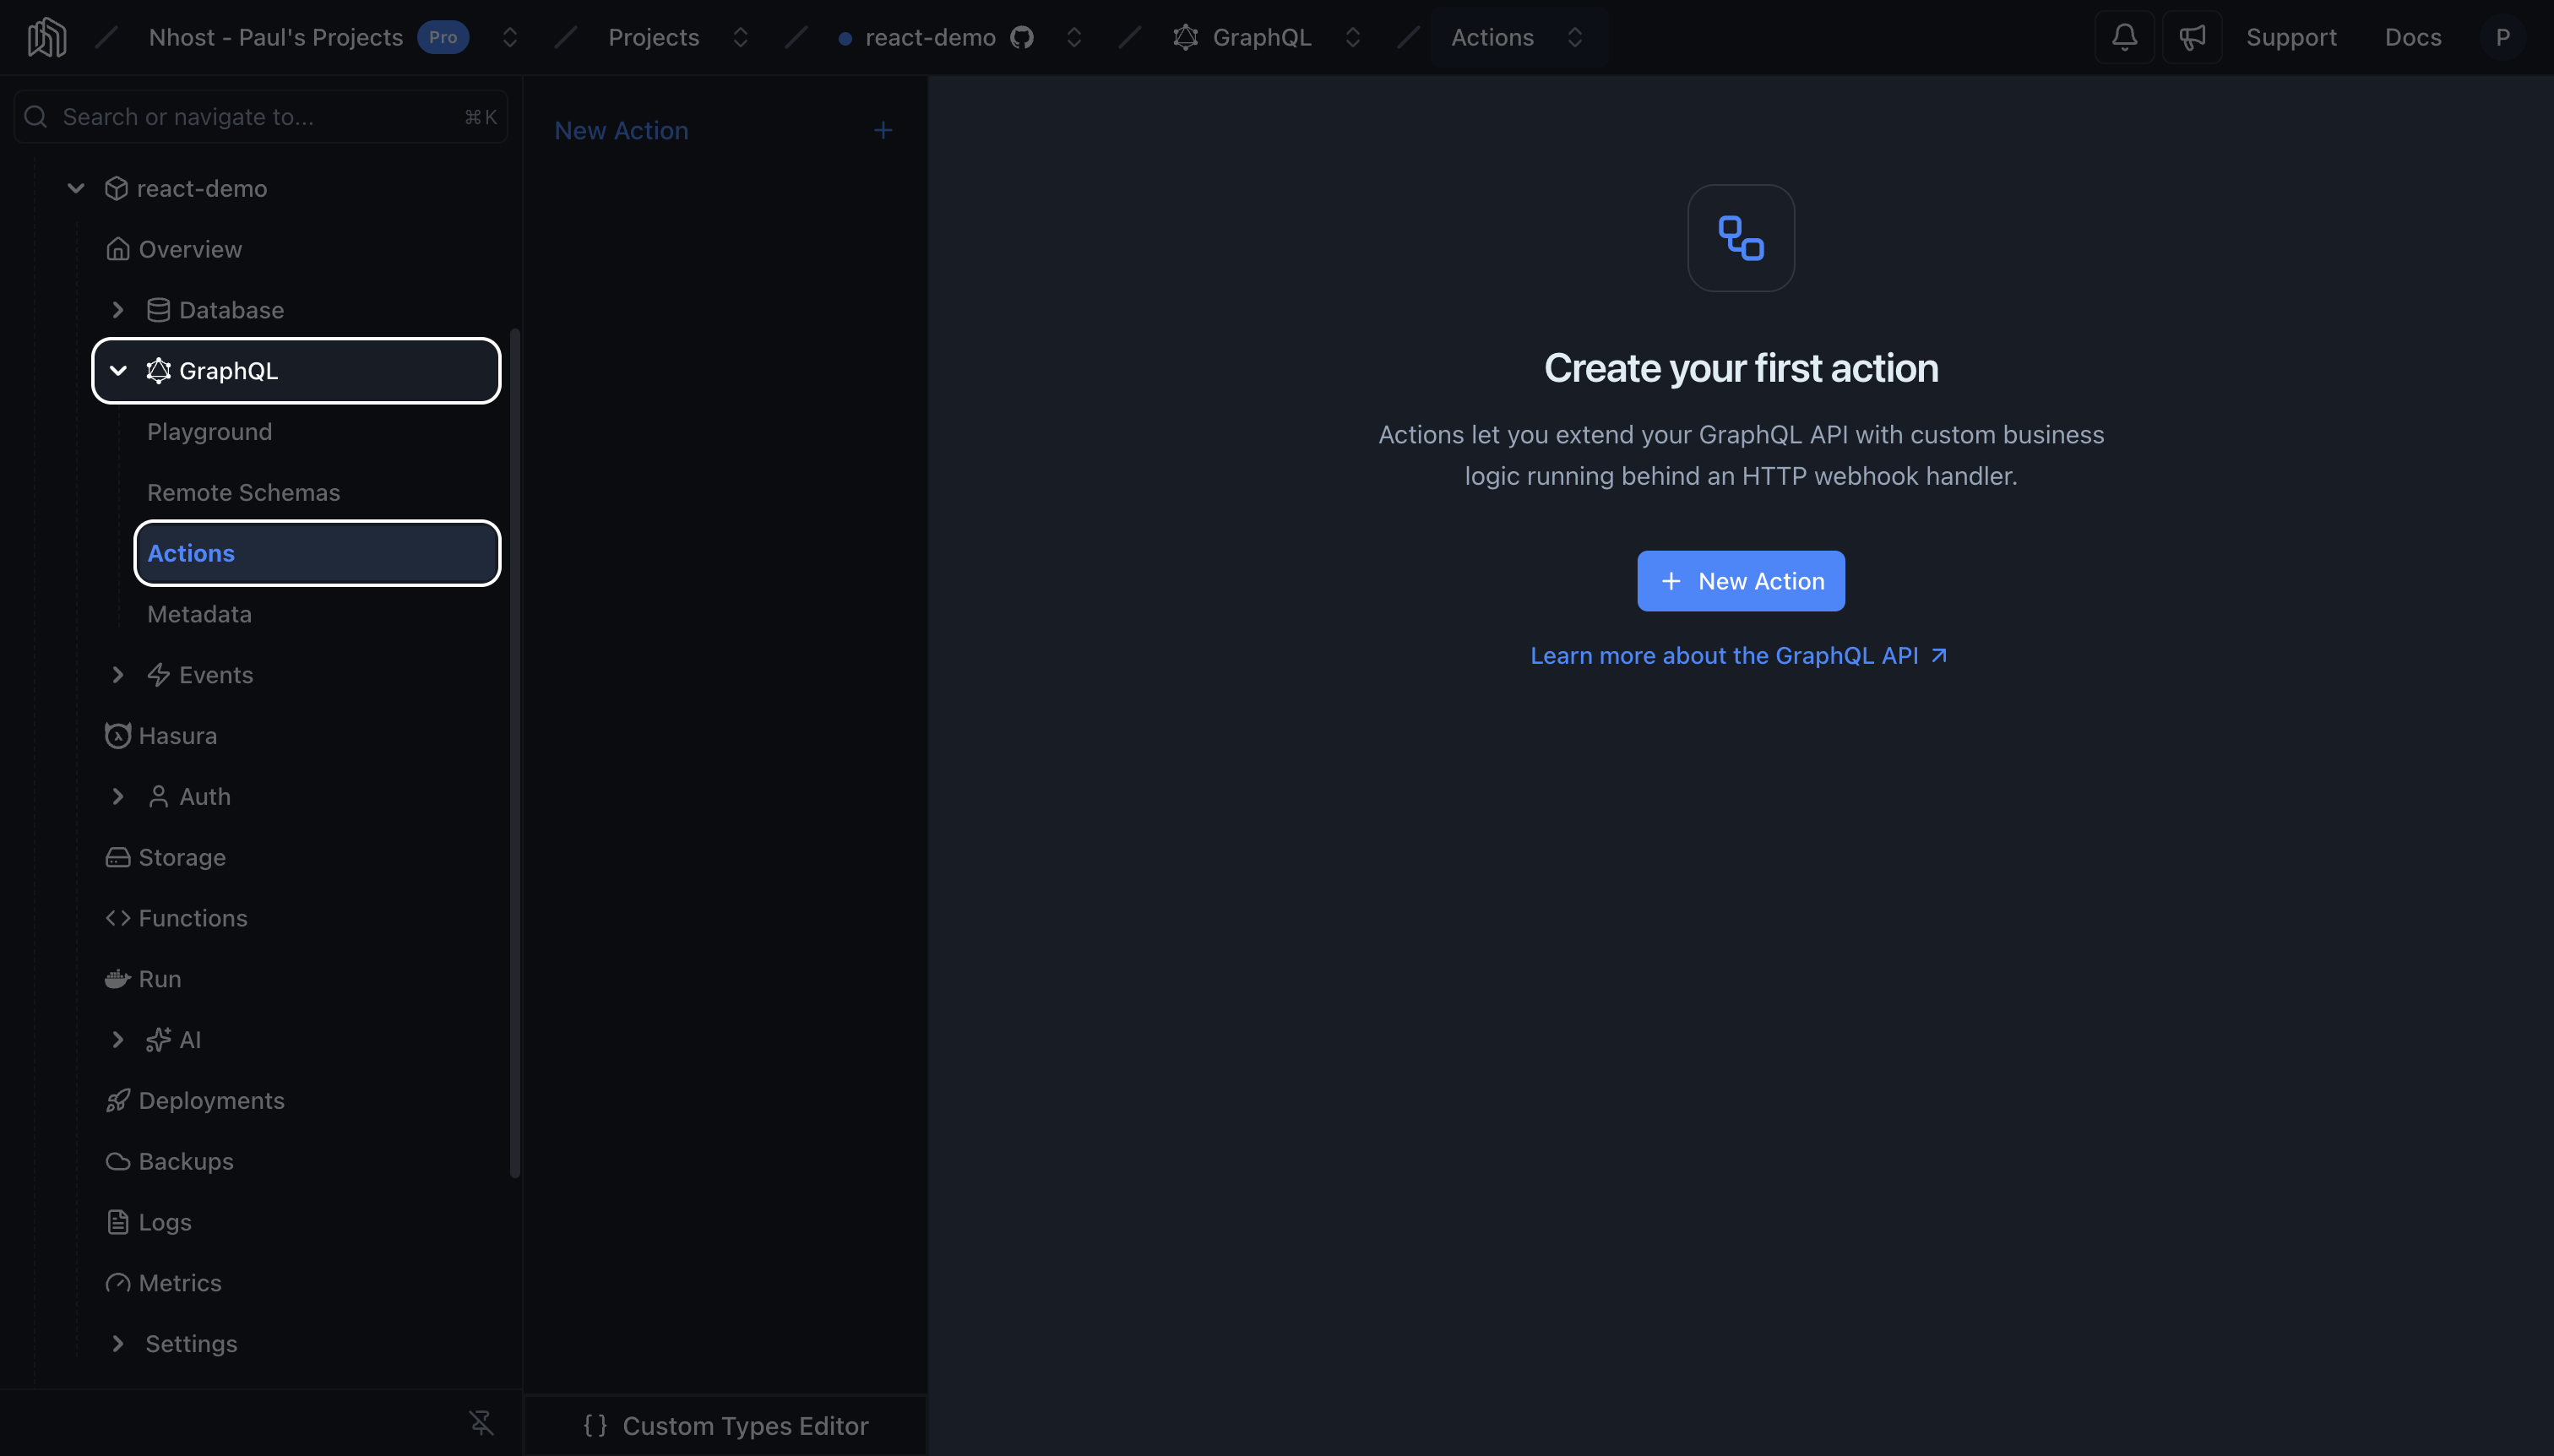
In your project dashboard, go to GraphQL > Actions and click New Action to open the configuration form.
-
Define the Action
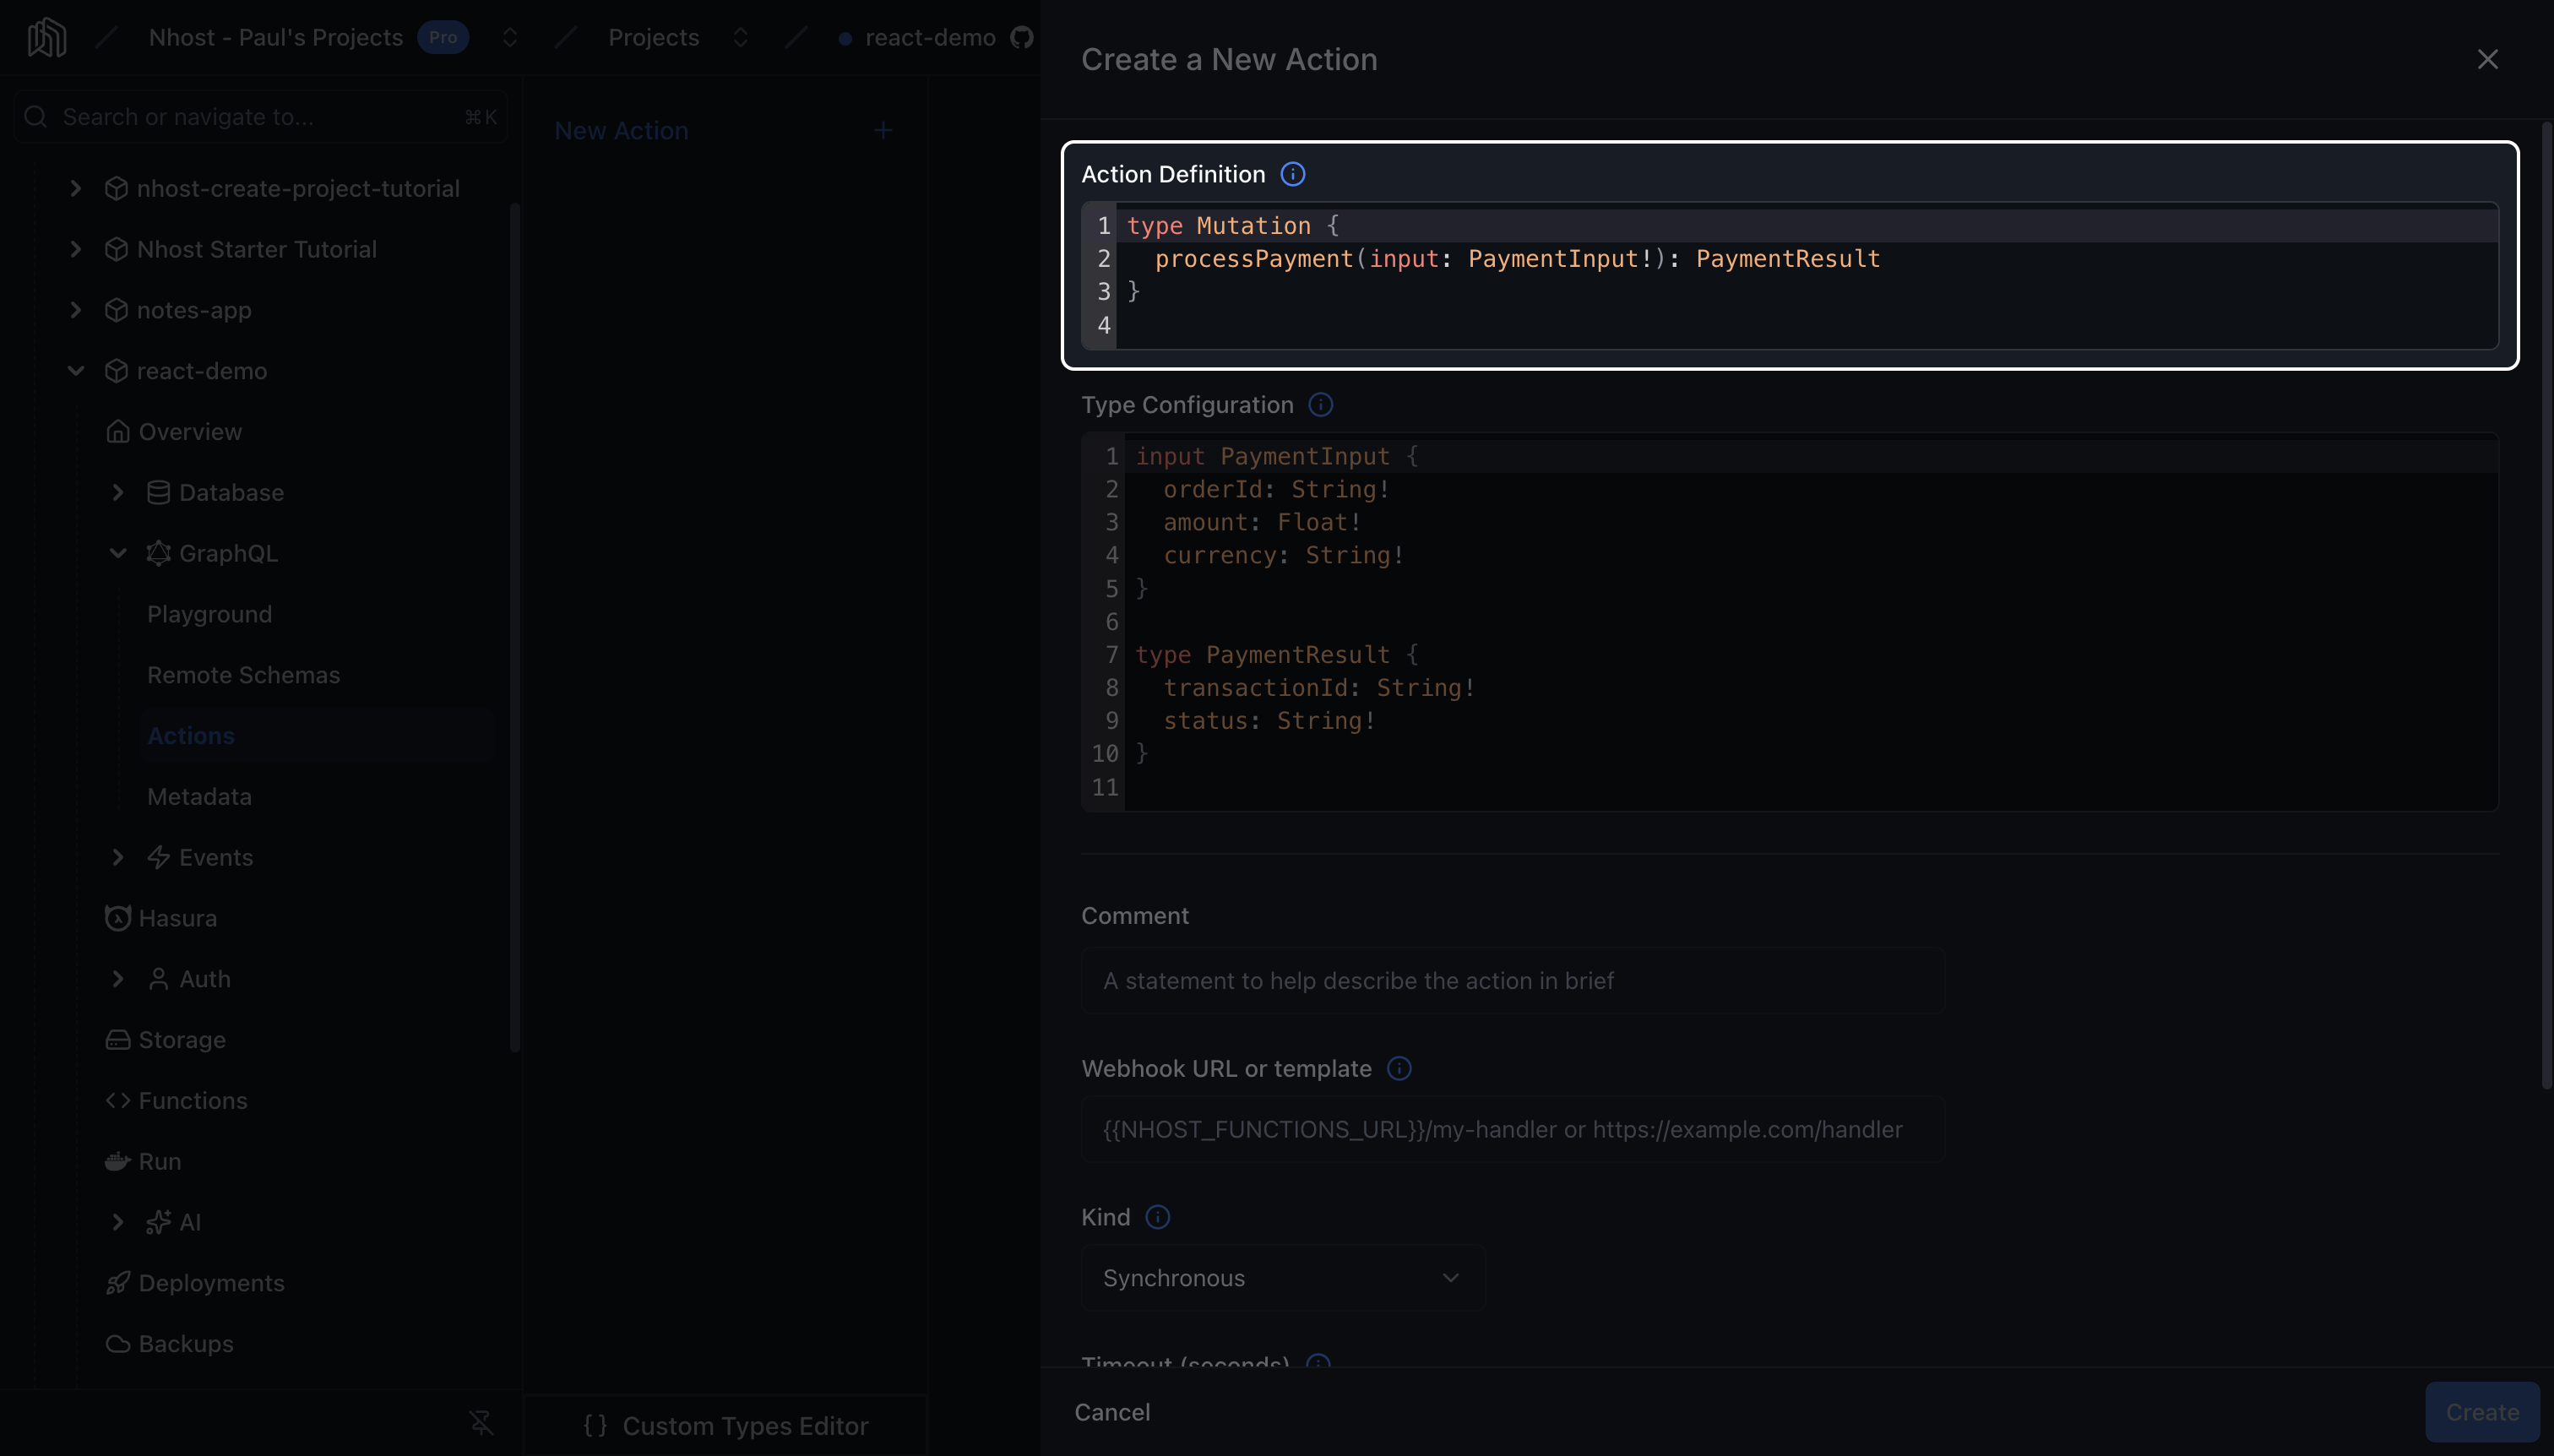
Enter the Action Definition: a single field under a
MutationorQuerytype.type Mutation {processPayment(input: PaymentInput!): PaymentResult} -
Configure the types
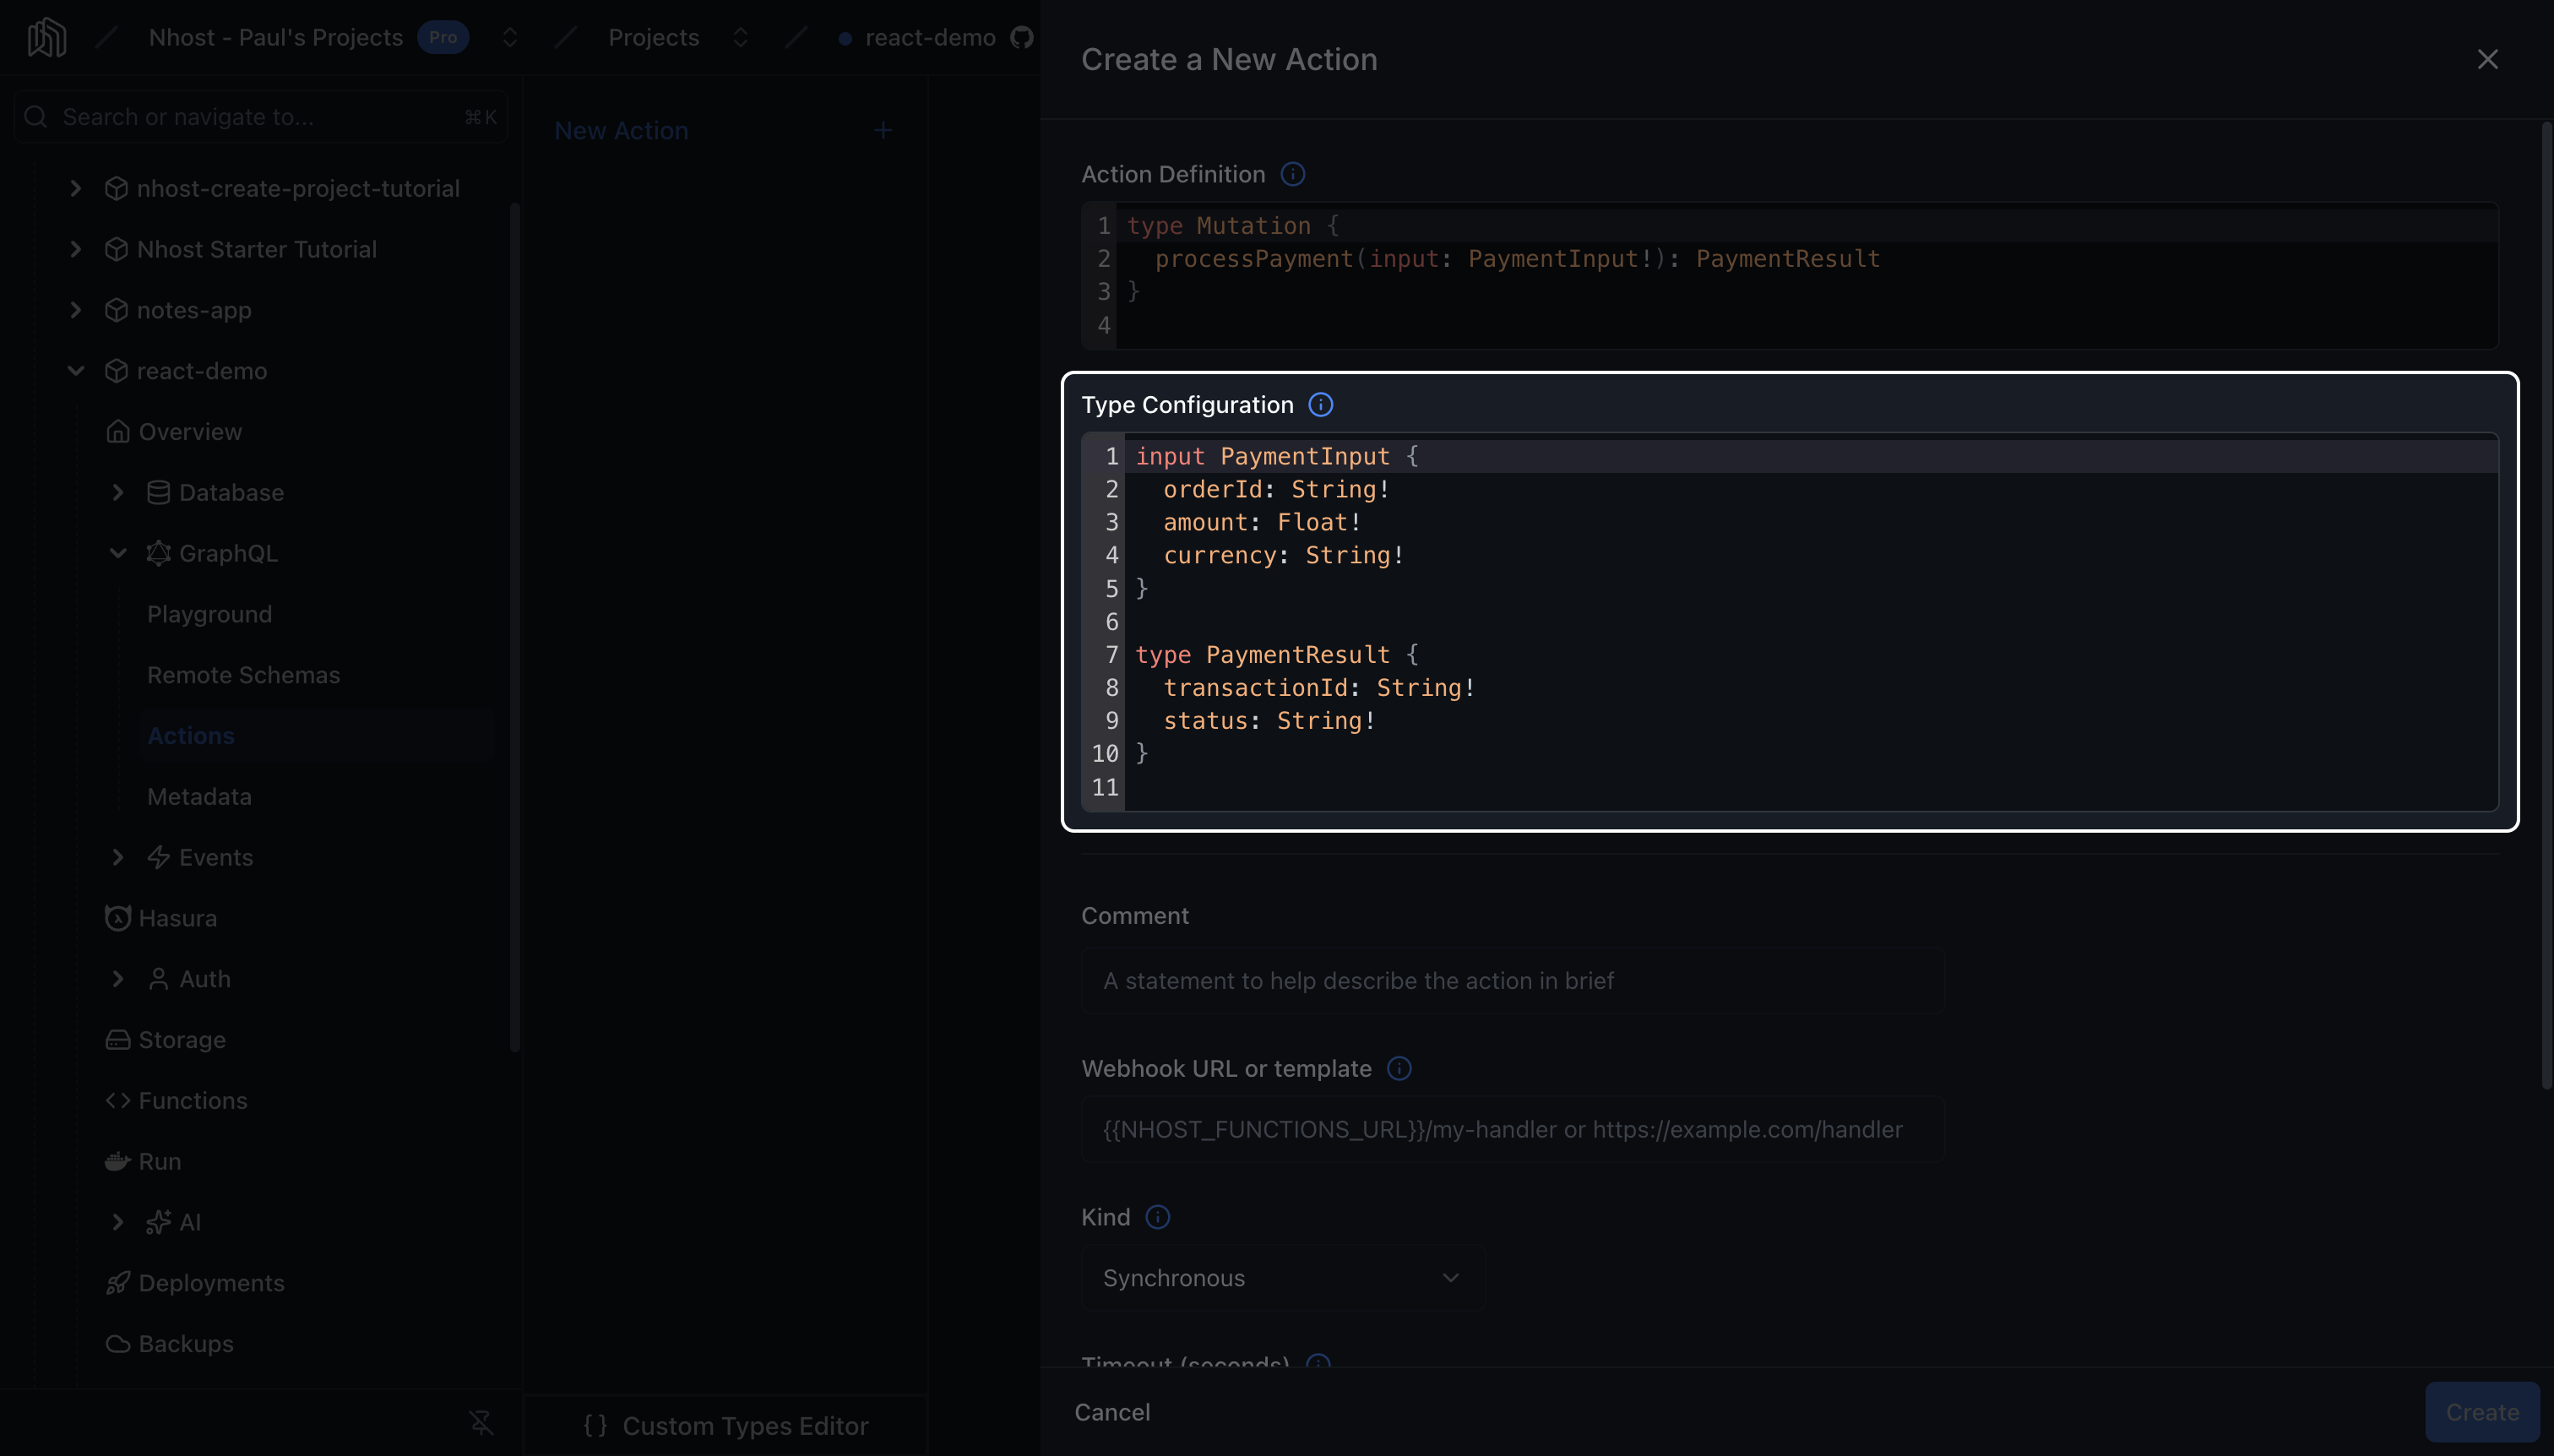
In Type Configuration, define the input and output types the Action uses.
input PaymentInput {orderId: String!amount: Float!currency: String!}type PaymentResult {transactionId: String!status: String!} -
Set the handler and options
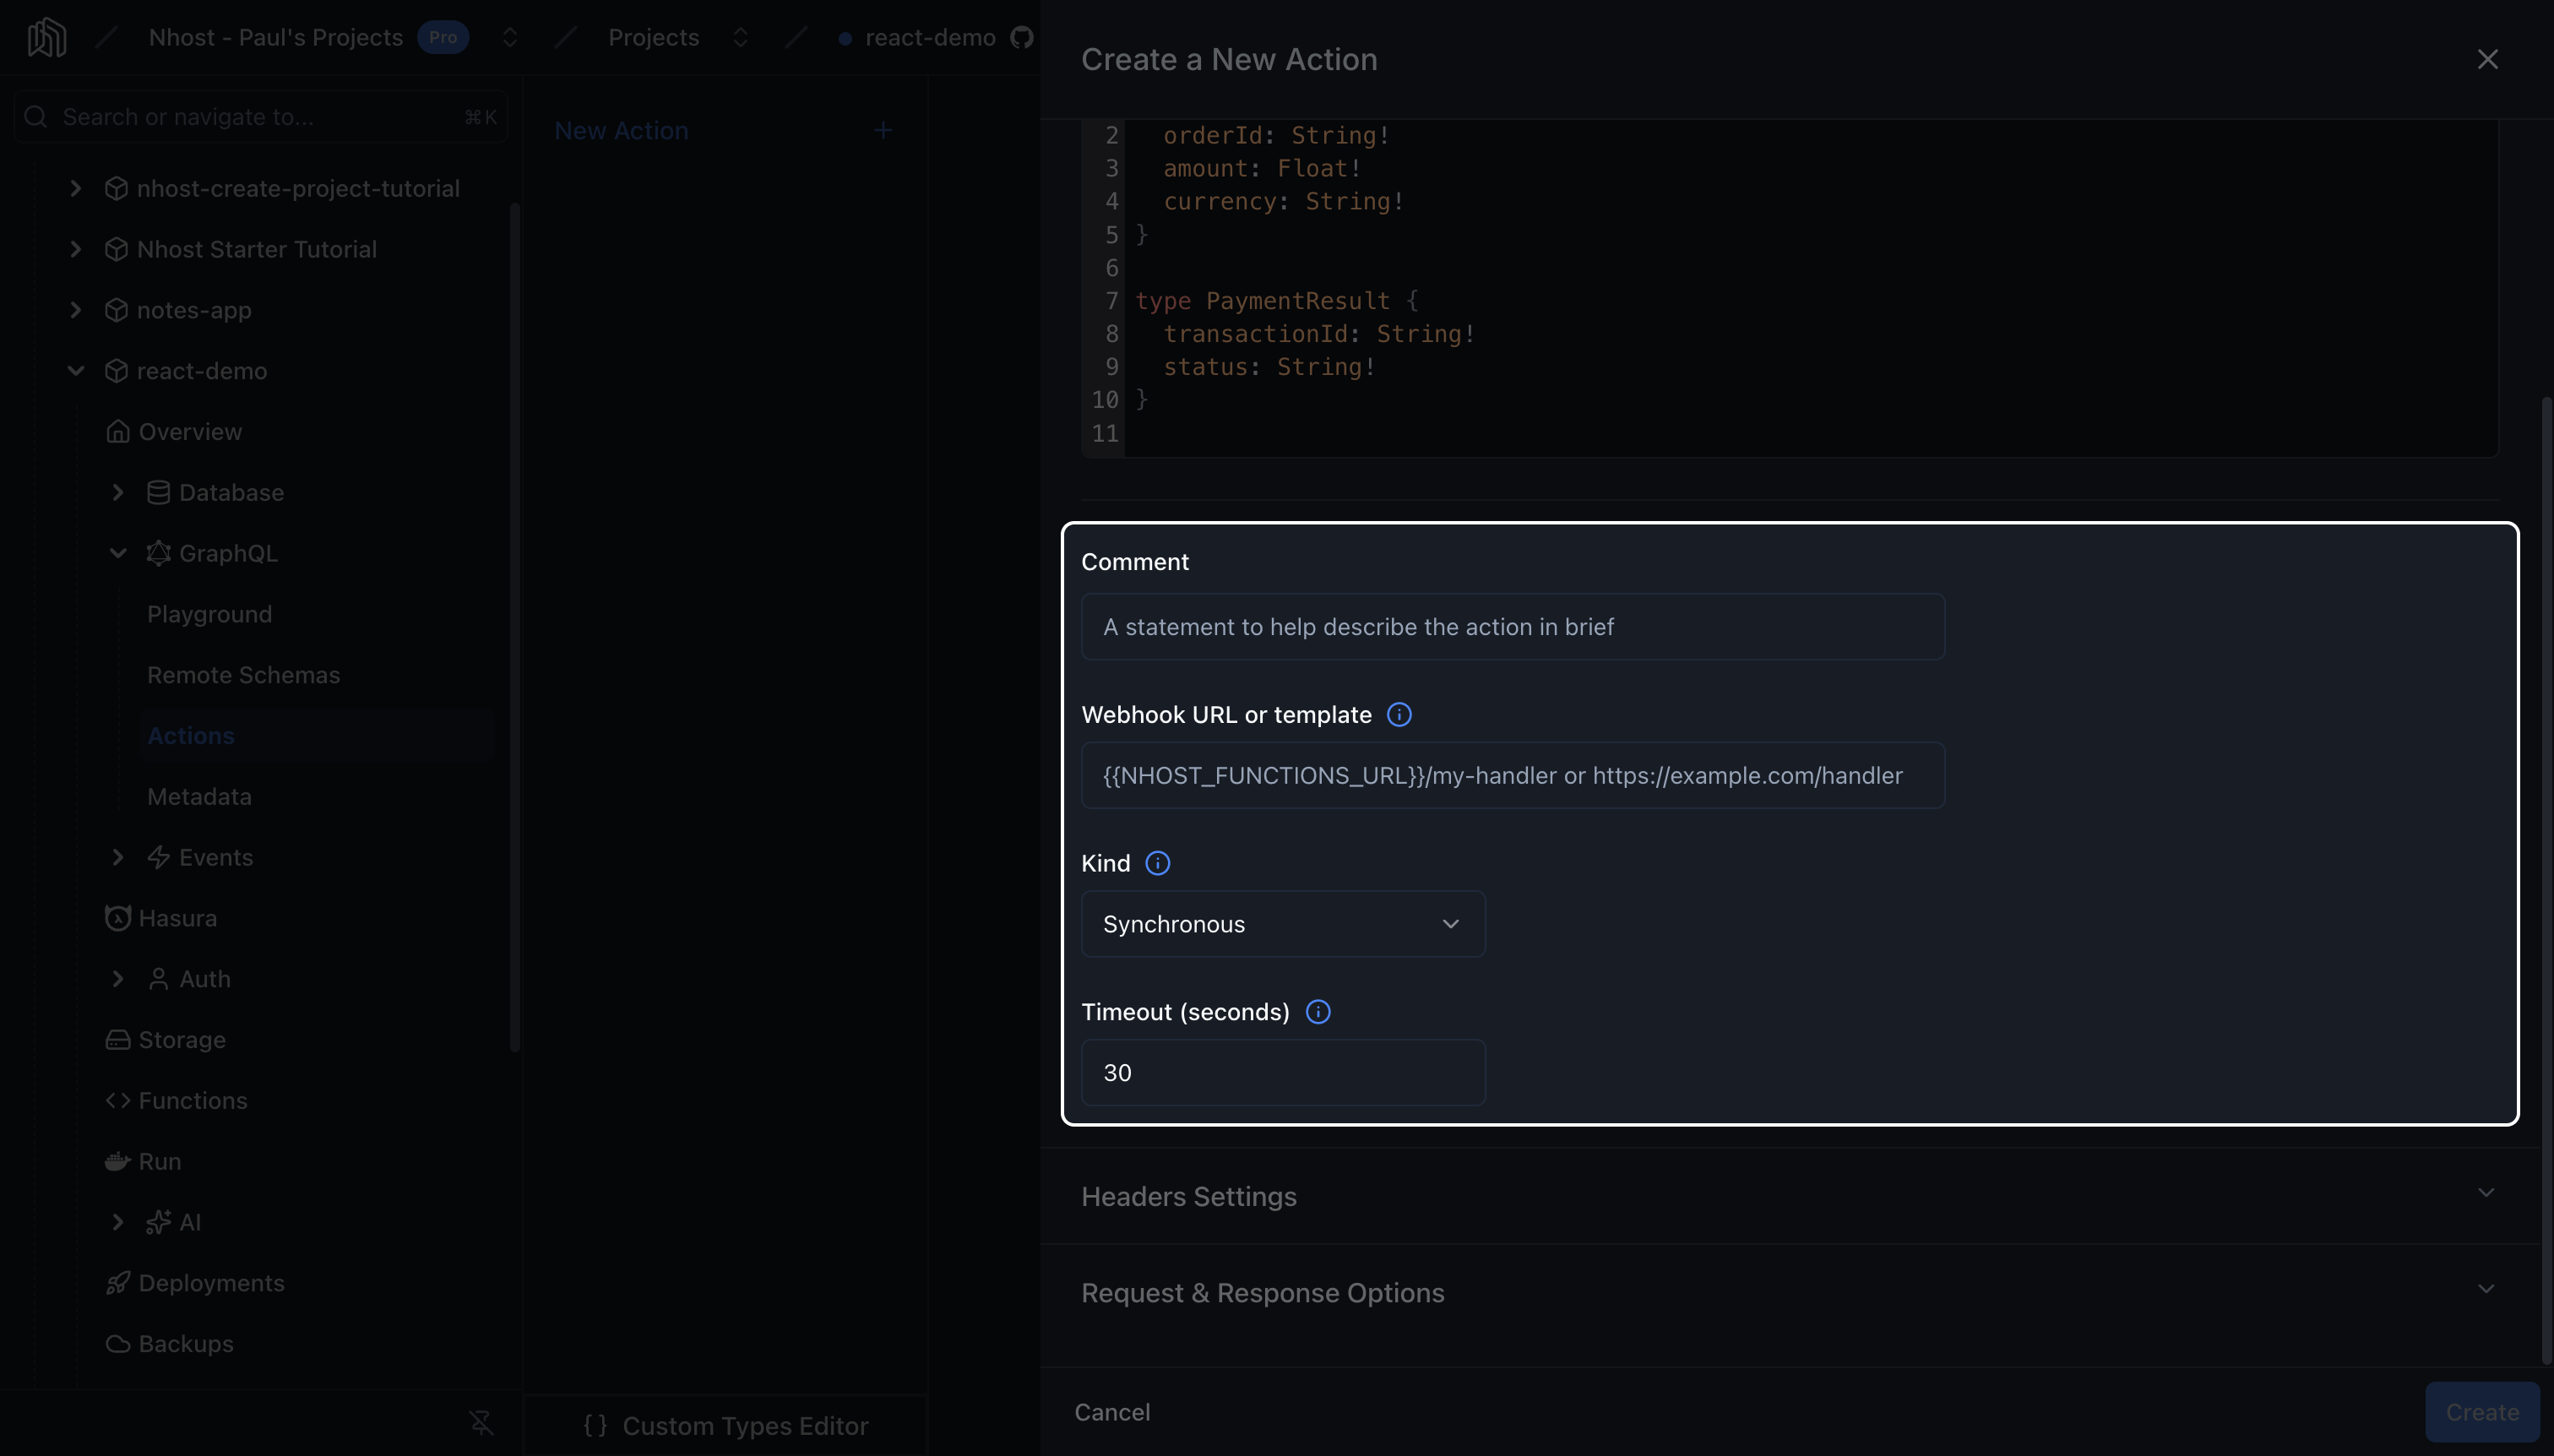
- Comment: an optional short description. It surfaces as the field’s description in GraphQL introspection.
- Webhook URL or template: the handler endpoint. You can reference environment variables with the
{{VARIABLE}}syntax, for example{{NHOST_FUNCTIONS_URL}}/process-payment. See Environment Variables for more details. - Kind: Synchronous or Asynchronous. An asynchronous Action returns an action id immediately and the response can be fetched later. Query Actions are always synchronous; only mutations can run asynchronously.
- Timeout: the number of seconds to wait for the handler response before timing out (default: 30).
-
Configure headers and transforms (optional)
Expand Headers Settings to forward the client’s headers to your handler or send additional ones, and Request & Response Options to reshape the outgoing request or the handler’s response. Both are covered in detail in Headers and Transforms below.
-
Create
Click Create. The Action is now part of your GraphQL schema.
Everything the dashboard form configures lives in two files in your project’s metadata. Editing them directly is the natural path when you manage your project as code, and it is the most direct format for AI coding agents.
nhost/metadata/actions.graphql holds the GraphQL definitions: the Action’s field plus its custom types.
type Mutation { processPayment(input: PaymentInput!): PaymentResult}
input PaymentInput {  orderId: String!  amount: Float!  currency: String!}
type PaymentResult { transactionId: String! status: String!}nhost/metadata/actions.yaml holds everything else: the handler, kind, headers, permissions, and any relationships on the output types.
actions: - name: processPayment definition: kind: synchronous handler: '{{NHOST_FUNCTIONS_URL}}/process-payment' forward_client_headers: true headers: - name: x-source value: main-api - name: x-payments-api-key value_from_env: PAYMENTS_API_TOKEN comment: Process a payment and return the transaction result. permissions: - role: usercustom_types: enums: [] input_objects: - name: PaymentInput objects: - name: PaymentResult scalars: []Run nhost up to apply the change to your local project.
Headers
Section titled “Headers”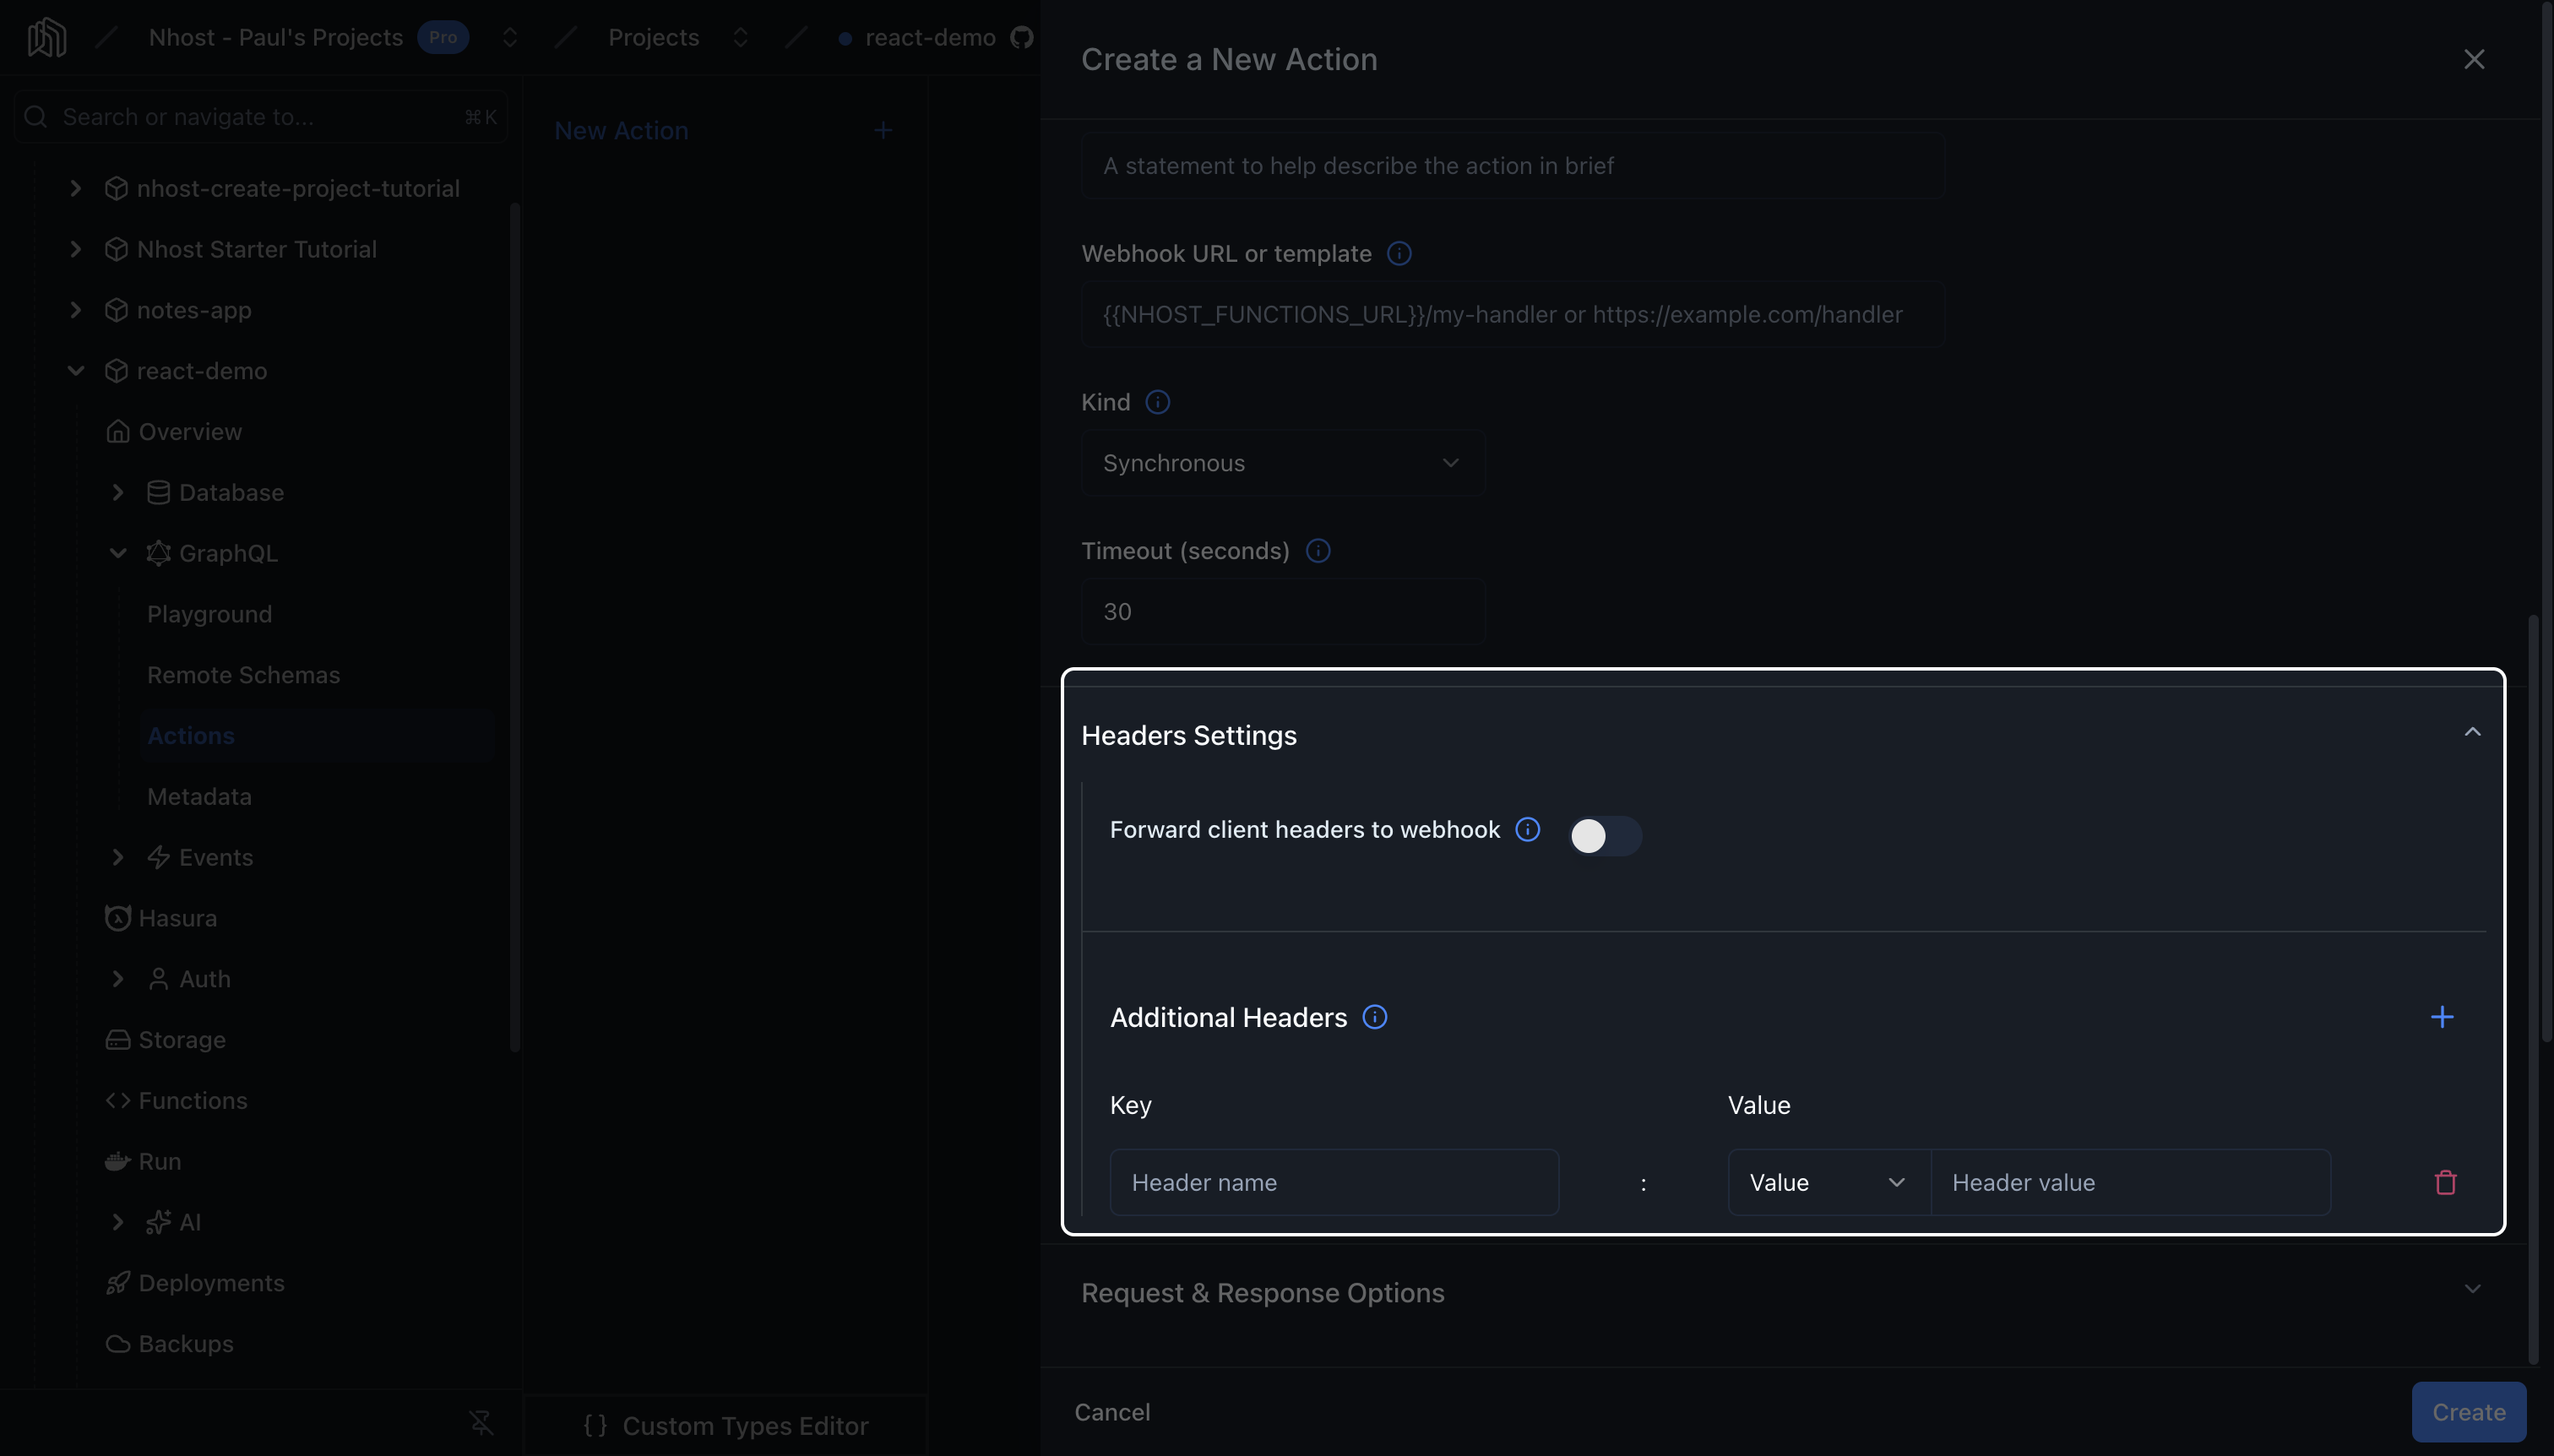
Actions often need to send authentication or context to the handler. Expand Headers Settings on the Action form to configure them.
Forward client headers to webhook: pass the headers sent by the client app (such as Authorization) along to your handler. Enable it when the handler needs the caller’s authentication token or other request context.
Additional Headers: click + to add a row. Each row is a key, a type, and a value, and the type decides how the value is read:
- Value sends what you type, exactly as typed. Use it for constants, such as the key
x-sourcewith the valuemain-api. - Env Var treats what you type as the name of an environment variable and sends that variable’s contents at request time. Use it for secrets, such as the key
x-payments-api-keywith the env varPAYMENTS_API_TOKEN, so you can rotate the value without editing the Action.
The two types map to the value and value_from_env keys in nhost/metadata/actions.yaml.
Transforms
Section titled “Transforms”Actions can reshape the outgoing request to the handler and the incoming response before it reaches the client. Expand Request & Response Options on the Action form to configure them. Transforms use the Kriti templating language, the same engine used by Event and Cron trigger transformations.
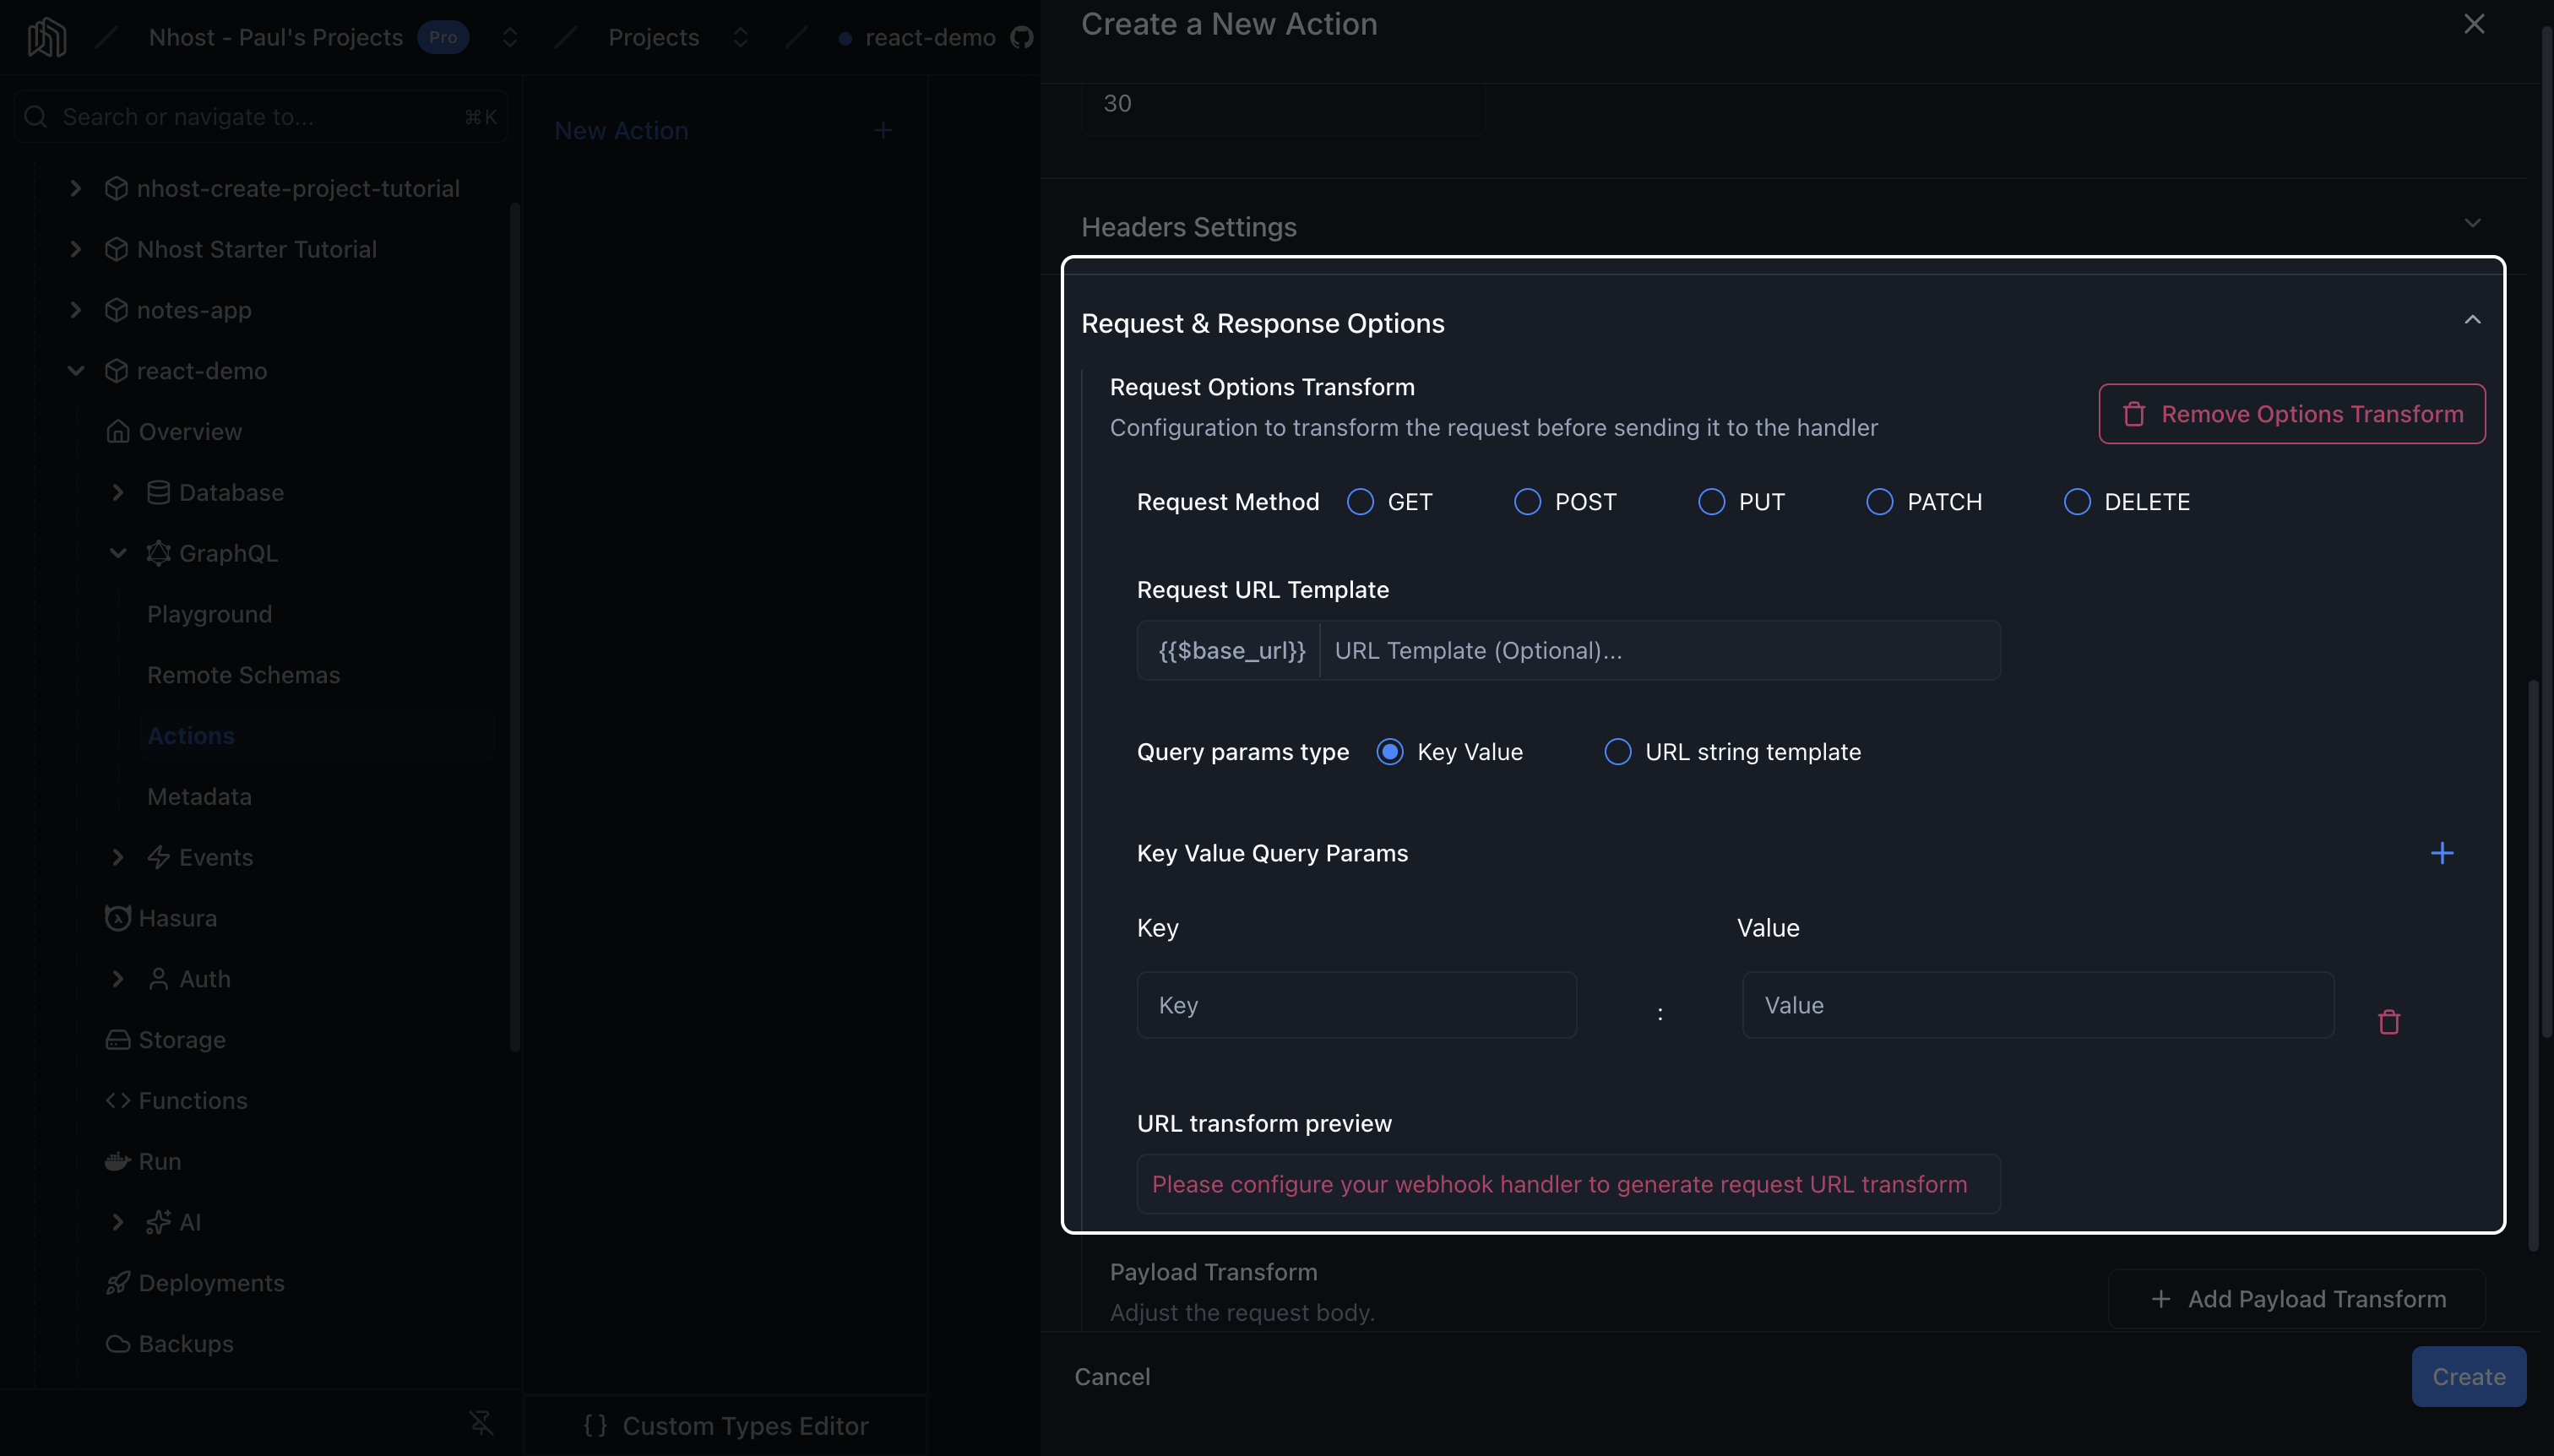
Request Options Transform: override the HTTP method, customize the URL with a template, and add query parameters.
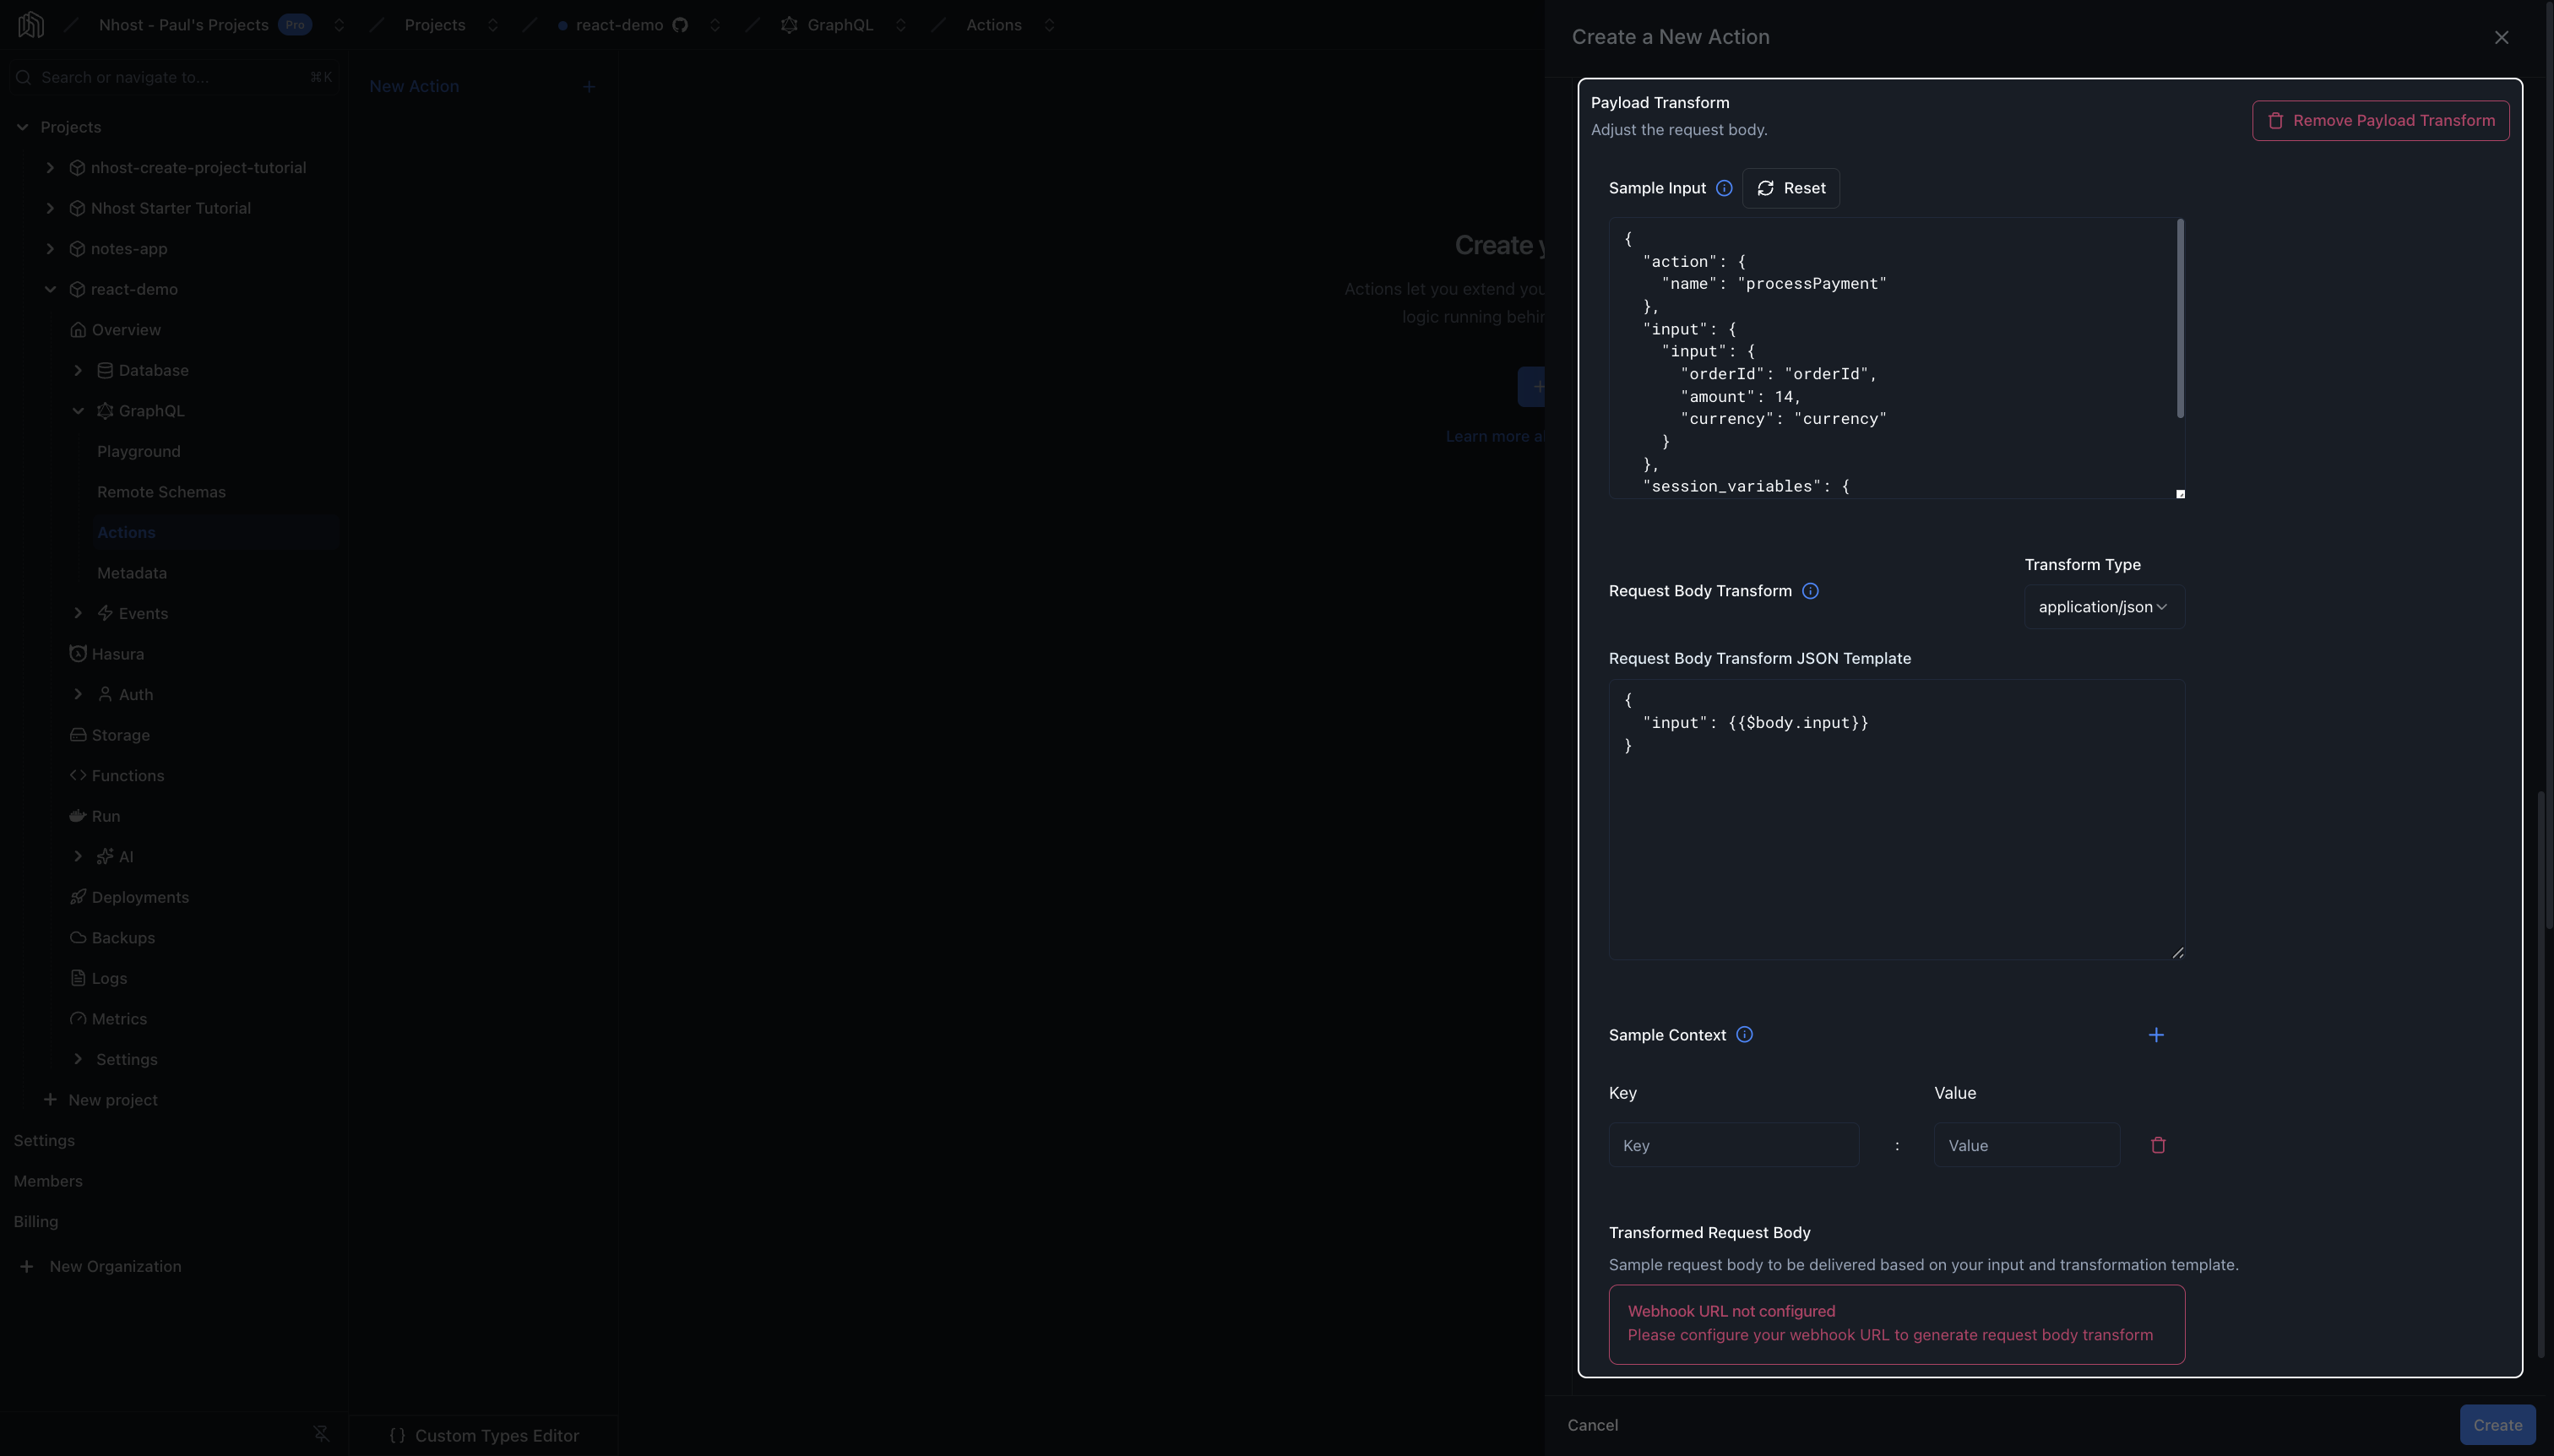
Payload Transform: reshape the request body. Choose a JSON Kriti template, a form-encoded (application/x-www-form-urlencoded) body, or disable the body. The dashboard shows a live preview from a sample input.
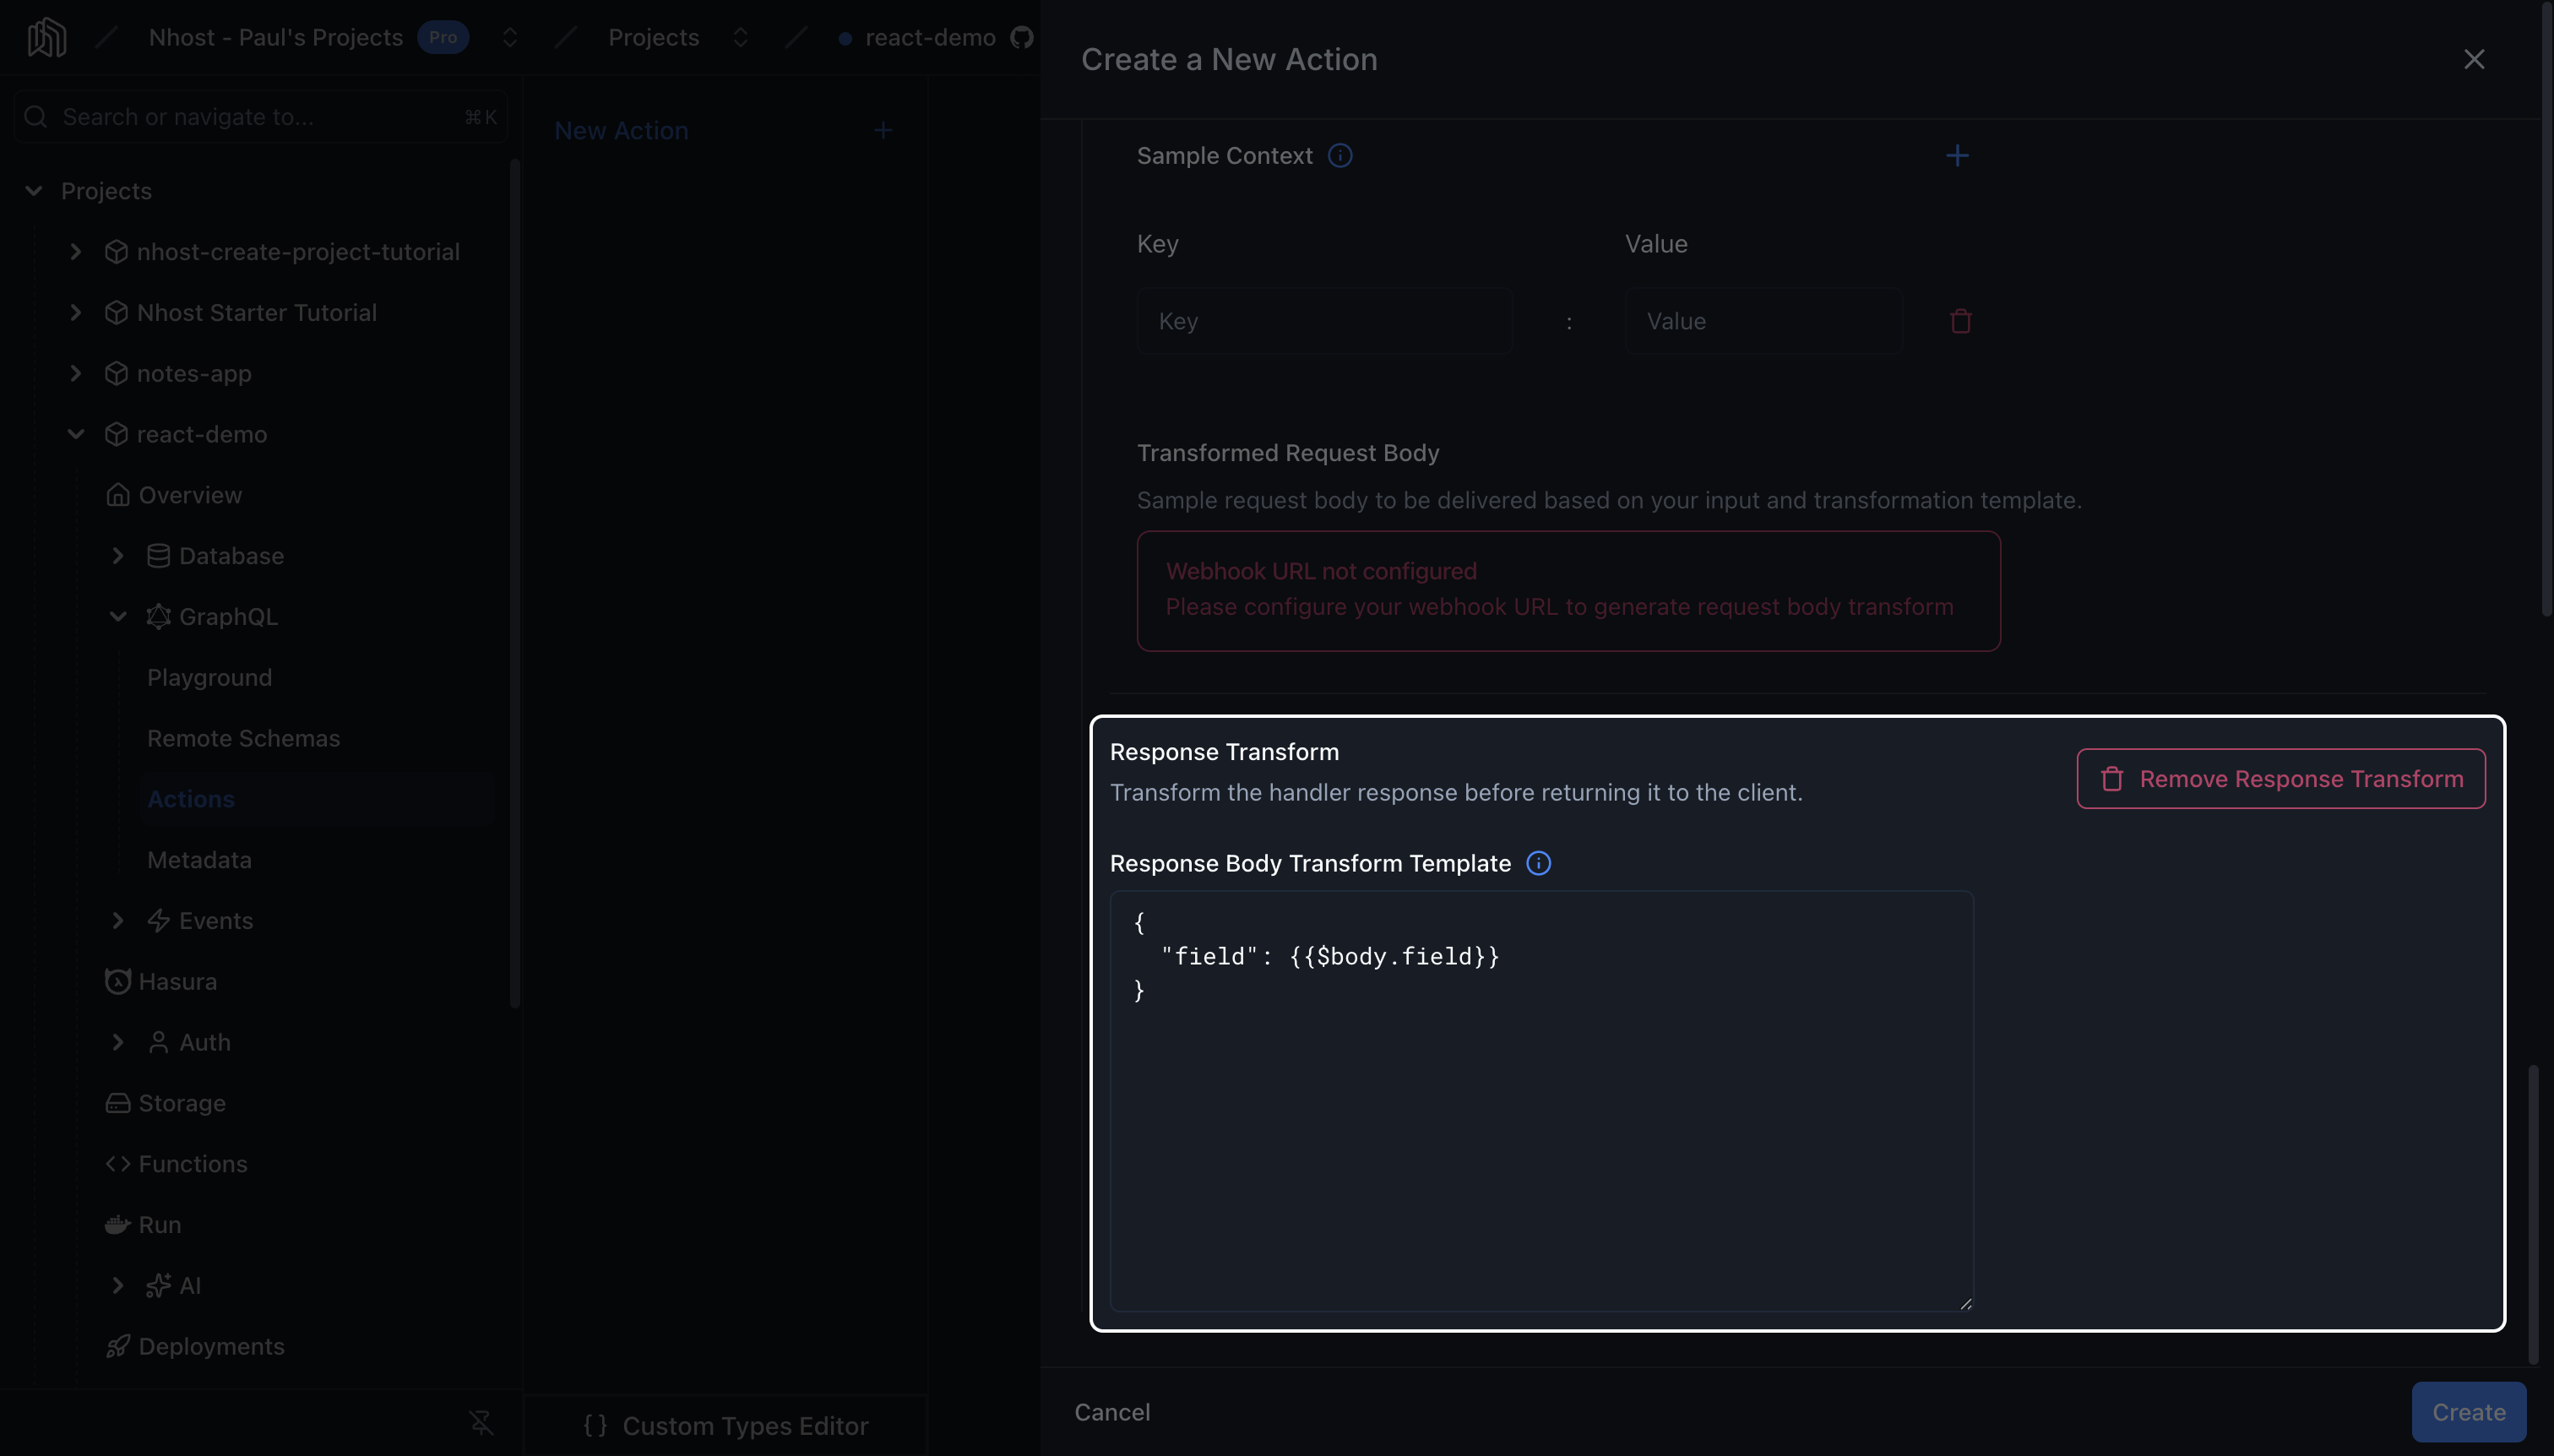
Response Transform: map the handler’s response to the Action’s output type with a Kriti template. Use {{$body}} to access the original response body.
For the full list of template variables, see Transformations.
Viewing an Action
Section titled “Viewing an Action”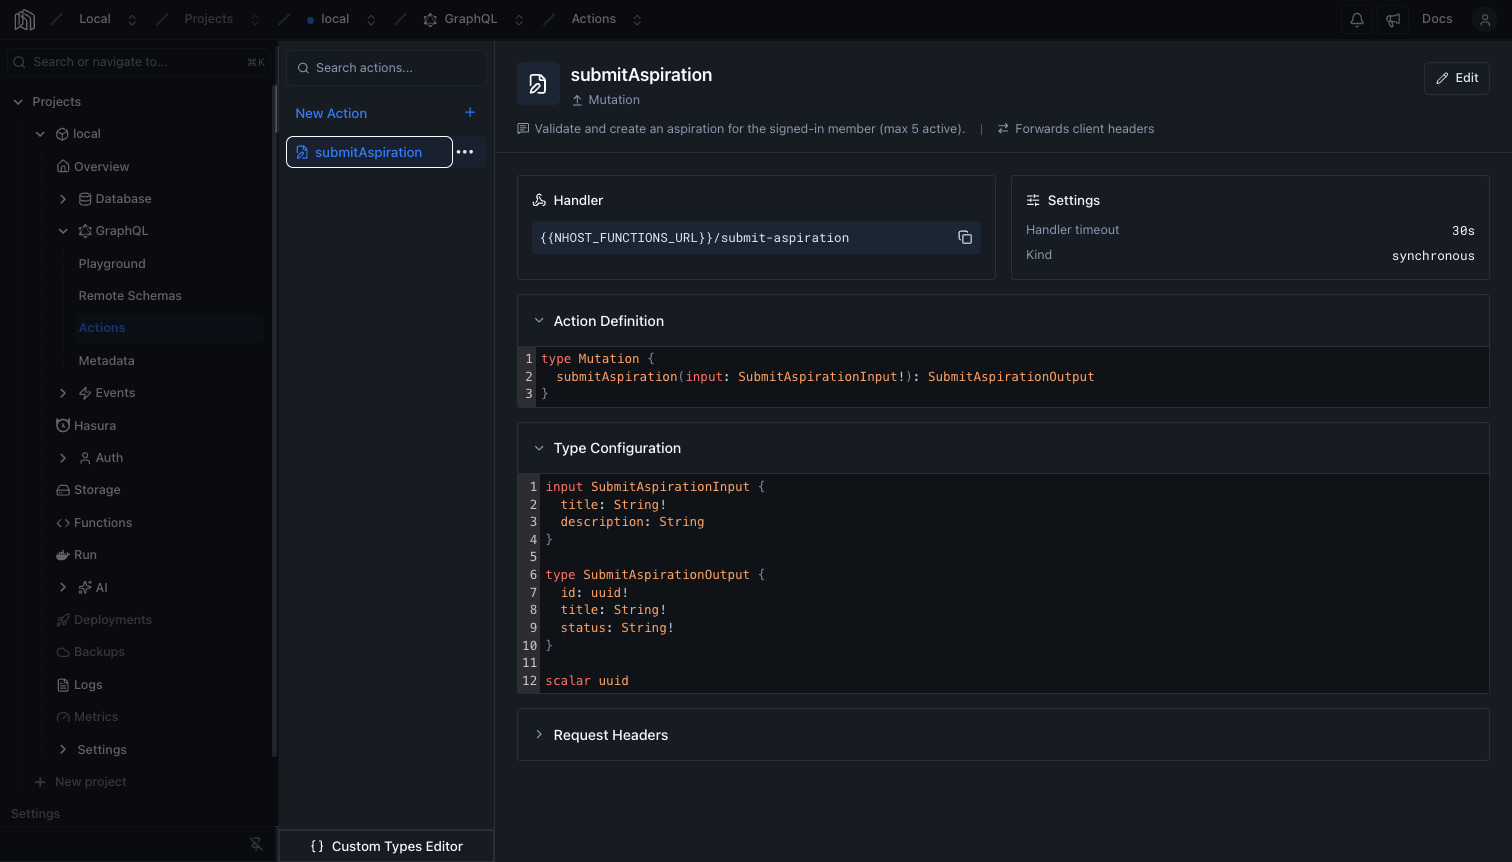
Selecting an Action from the sidebar opens its detail page, which shows:
- The handler URL, with a copy button.
- Settings: the handler timeout, and the kind (for mutations).
- The read-only Action Definition and Type Configuration.
- Any configured request headers and transforms.
The header indicates whether the Action is a Query (read-only) or a Mutation (modifies data), along with its comment and a badge when client headers are forwarded.
Editing and Deleting
Section titled “Editing and Deleting”Each Action in the sidebar has a ⋯ menu with Edit Action, Edit Permissions, Edit Relationships, and Delete Action.
Permissions
Section titled “Permissions”By default, only the admin role can call an Action. To let other roles call it, open the ⋯ menu for the Action and select Edit Permissions. Unlike table permissions, this is call-or-deny per role, with no column-level rules or row checks.
See Action Permissions for the walkthrough, and Permissions for how roles work.
Relationships
Section titled “Relationships”You can relate an Action’s response type to tables in your database, so a single query can return the Action’s result joined with related database rows.
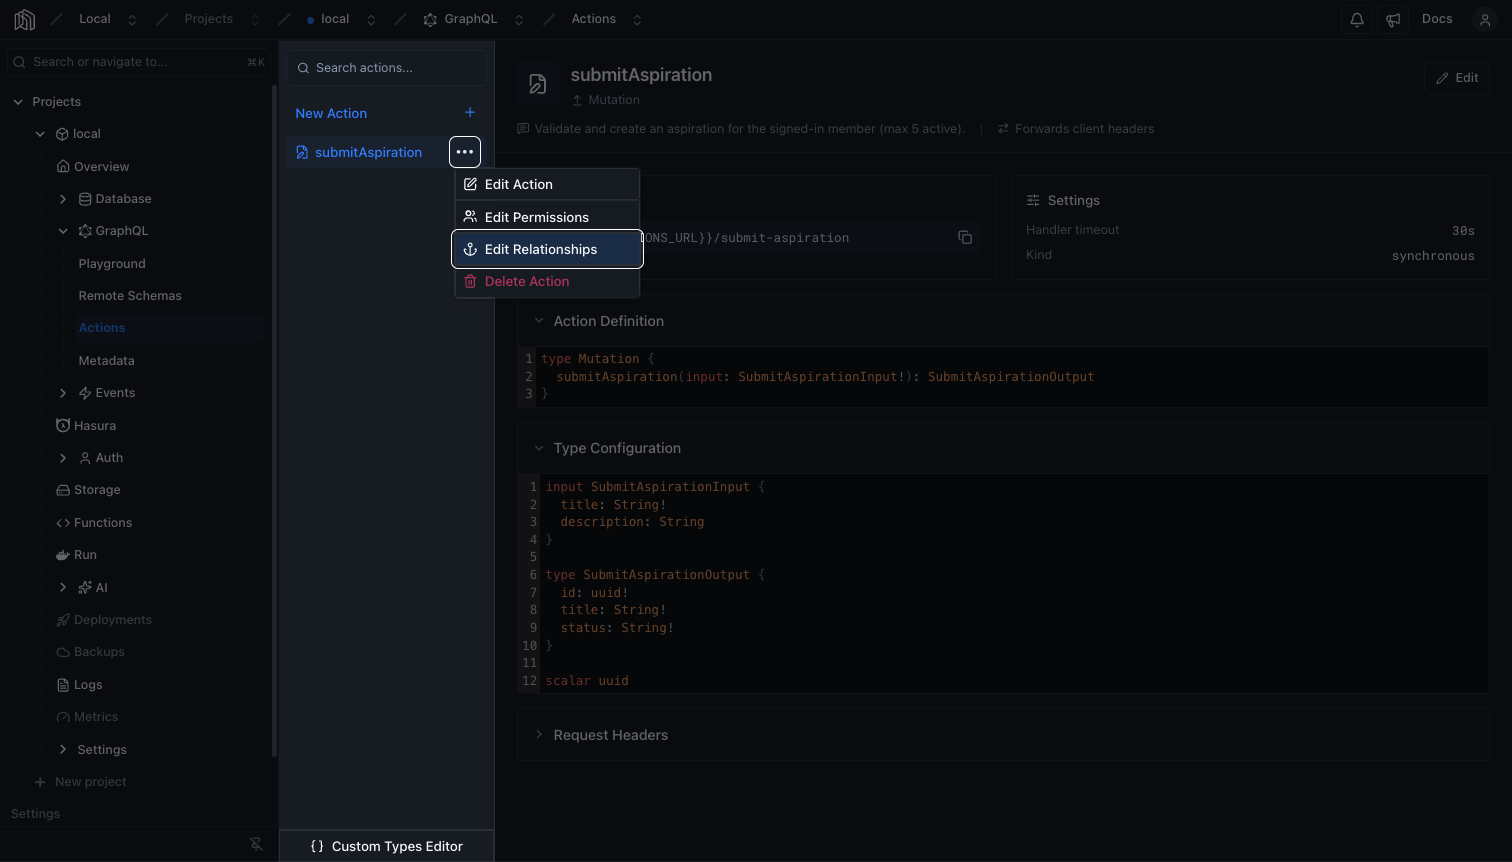
Open the ⋯ menu for an Action and select Edit Relationships. The list shows the relationships already defined on the Action’s output type. Click Relationship + to create one.
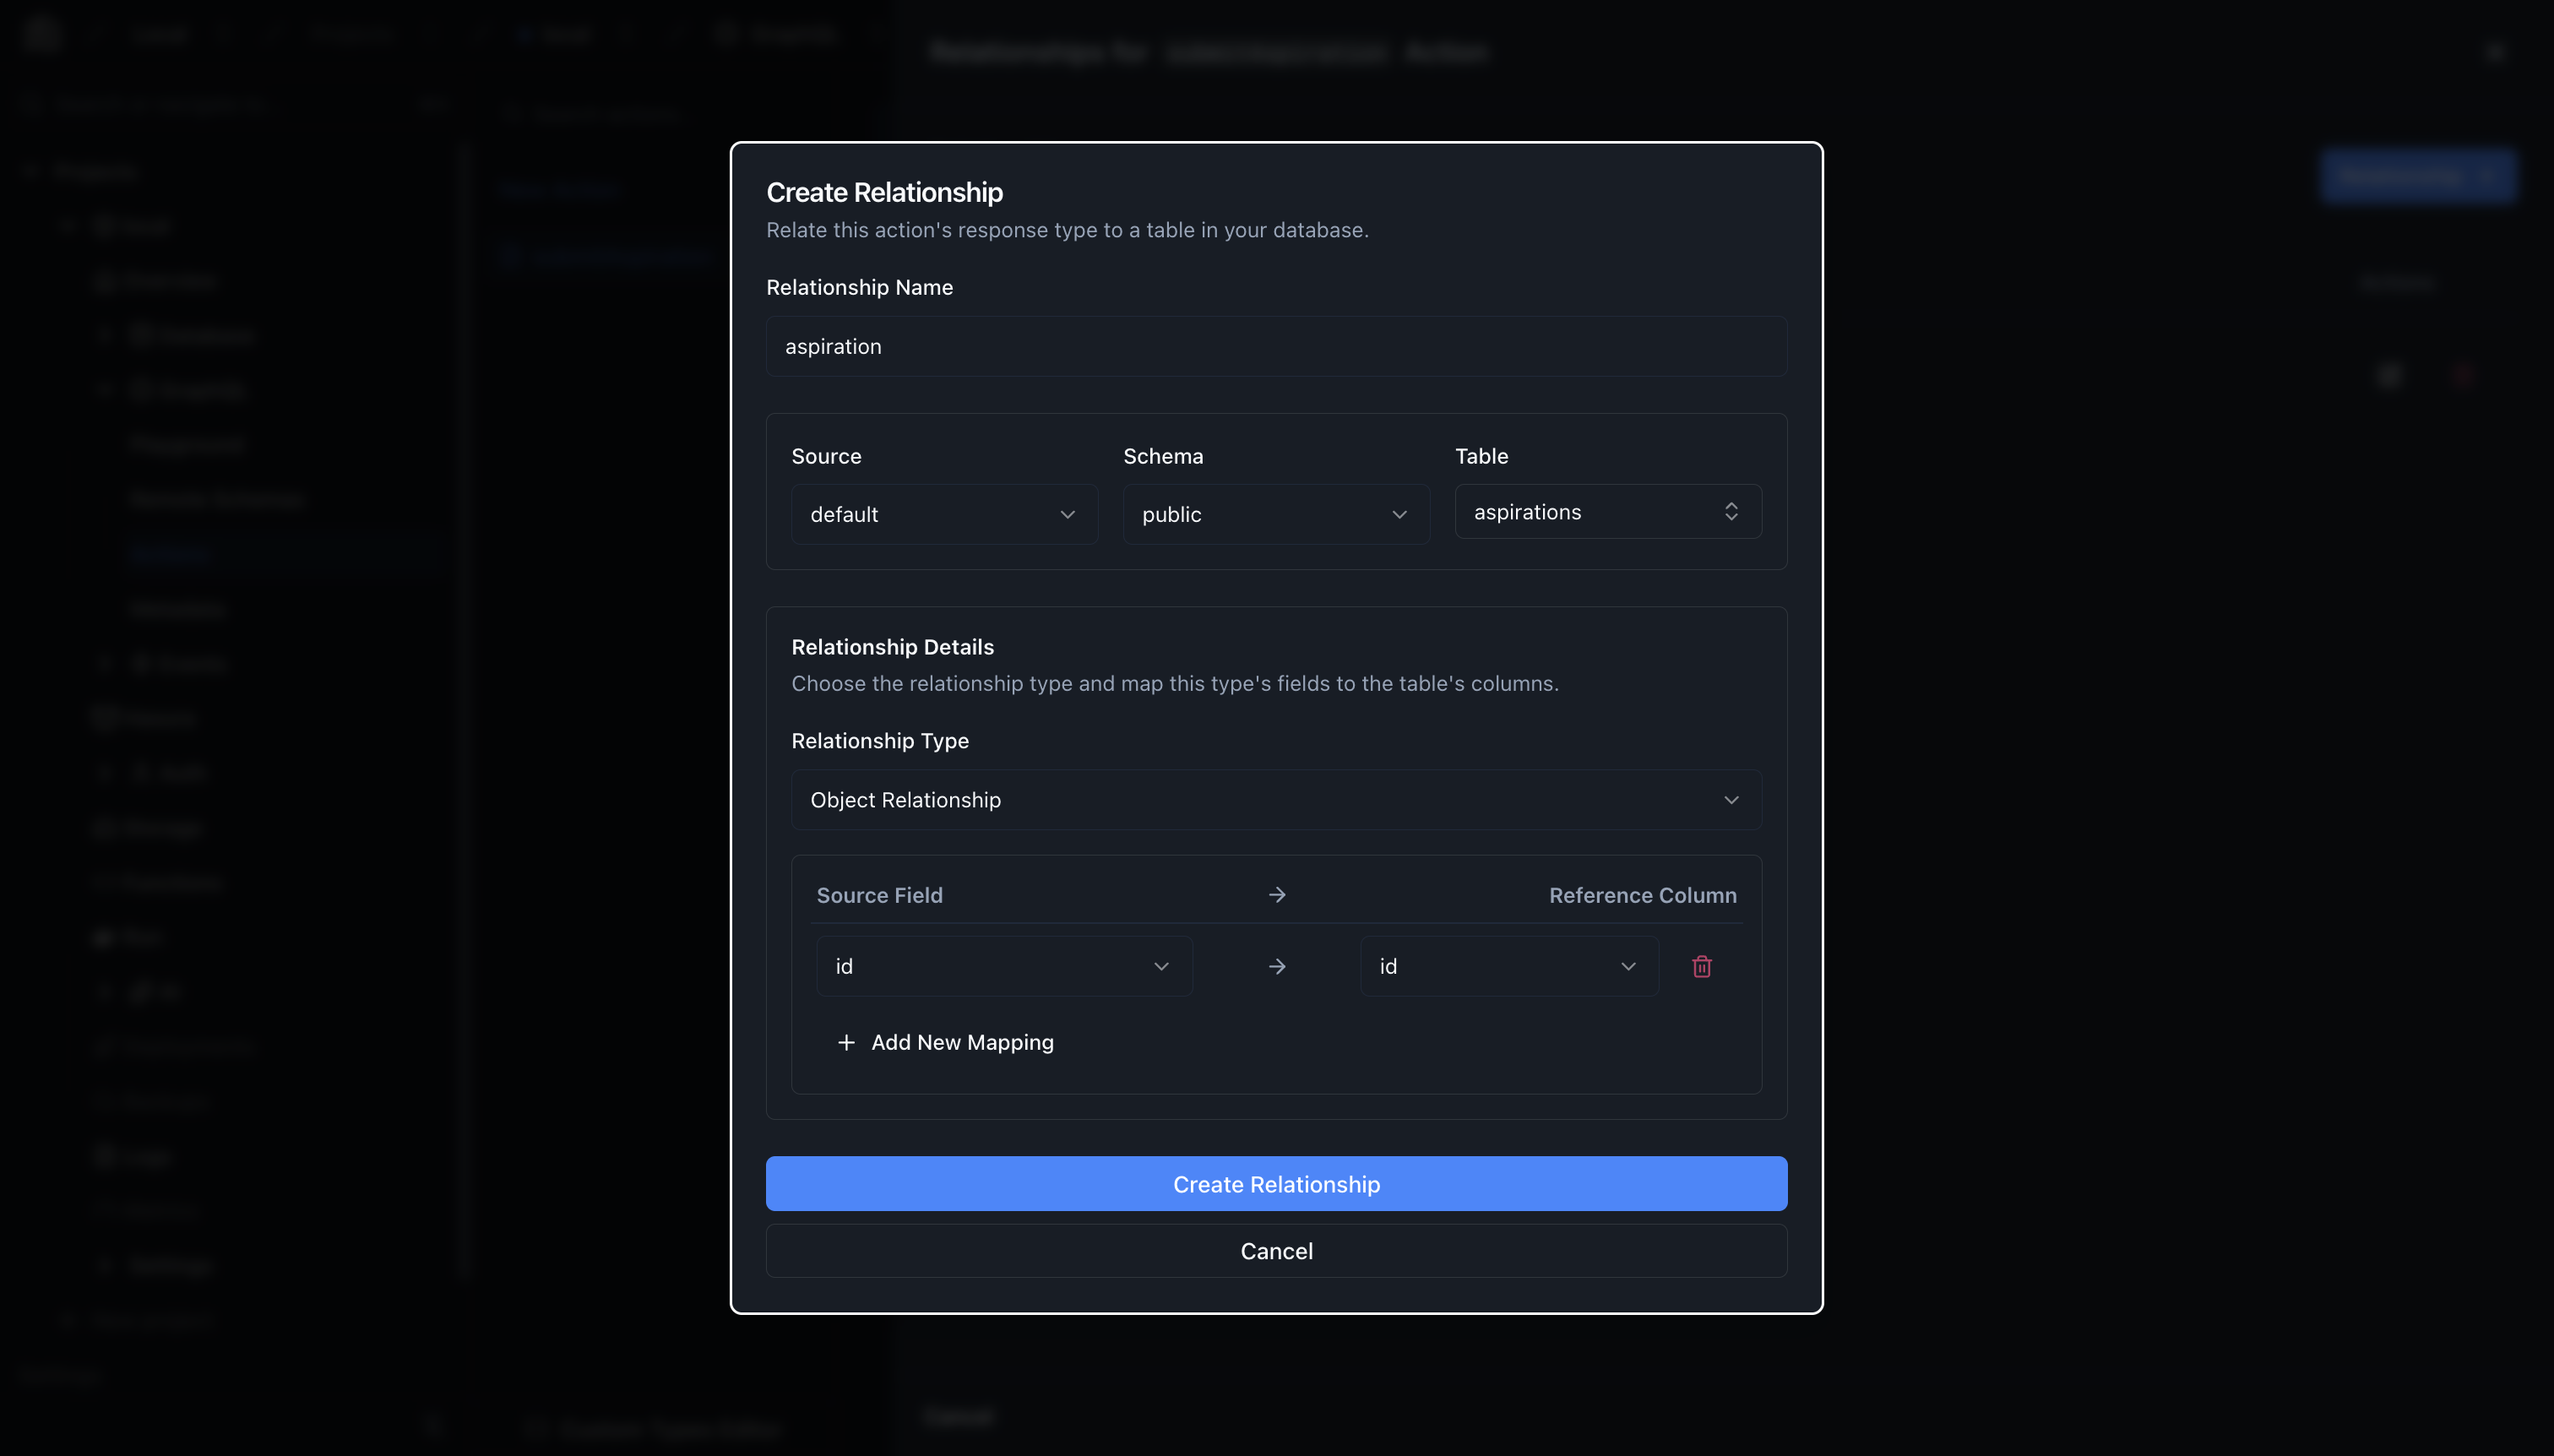
-
Name the relationship
Enter a Relationship Name. This becomes the field name on the output type in your GraphQL schema, so it has to be unique among the Action’s relationships.
-
Select the reference table
Choose the Source, Schema, and Table holding the rows you want to join.
-
Choose the relationship type
Under Relationship Details, pick Object Relationship for a single related row, or Array Relationship for a list of related rows.
-
Map the fields
Map a Source Field on the Action’s output type to a Reference Column on the table. Click Add New Mapping to match on more than one pair.
-
Create
Click Create Relationship. The relationship becomes available on the Action’s response type in your GraphQL schema.
To change an existing relationship, click the edit icon on its row. Everything except the name can be changed.
Custom Types Editor
Section titled “Custom Types Editor”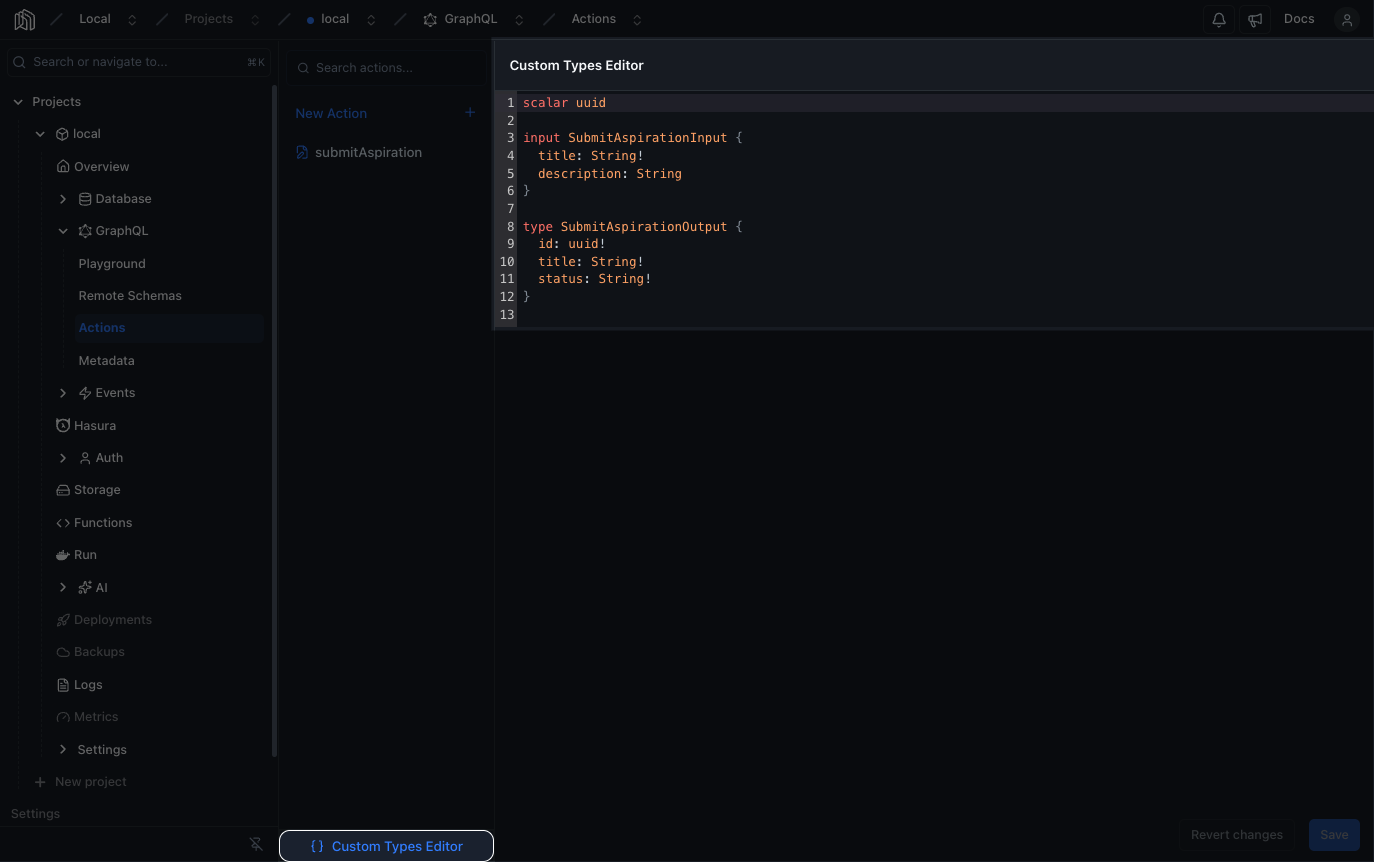
The Custom Types Editor, accessible from the bottom of the Actions sidebar, is a single SDL editor for all the custom types used across your Actions. Use it to review or edit input, object, enum, and scalar types in one place. Edit the SDL and click Save, or Revert changes to discard.
Troubleshooting
Section titled “Troubleshooting”| Symptom | What to check |
|---|---|
| Calls fail with a timeout | Raise the Action’s Timeout, confirm the handler is reachable from your Nhost project, or switch long-running work to an Asynchronous mutation. |
| Permission denied | Grant the user’s role permission in Edit Permissions. Only admin is allowed by default. |
| Handler returns 401 or 403 | Enable Forward client headers so the caller’s Authorization header reaches the handler, and confirm any header environment variables are set. |
| Saving warns that types will be overwritten | Rename the conflicting types in your Type Configuration, or reconcile them in the Custom Types Editor. |