

Permission Examples
Common patterns for setting up insert, select, update, and delete permissions, and for granting roles access to Actions
permissions examples insert select update delete row-level security actionsWorked examples for the most common permission patterns. The table examples build on the Permissions overview and use the same todos table (id, title, user_id).
Insert Permissions
Section titled “Insert Permissions”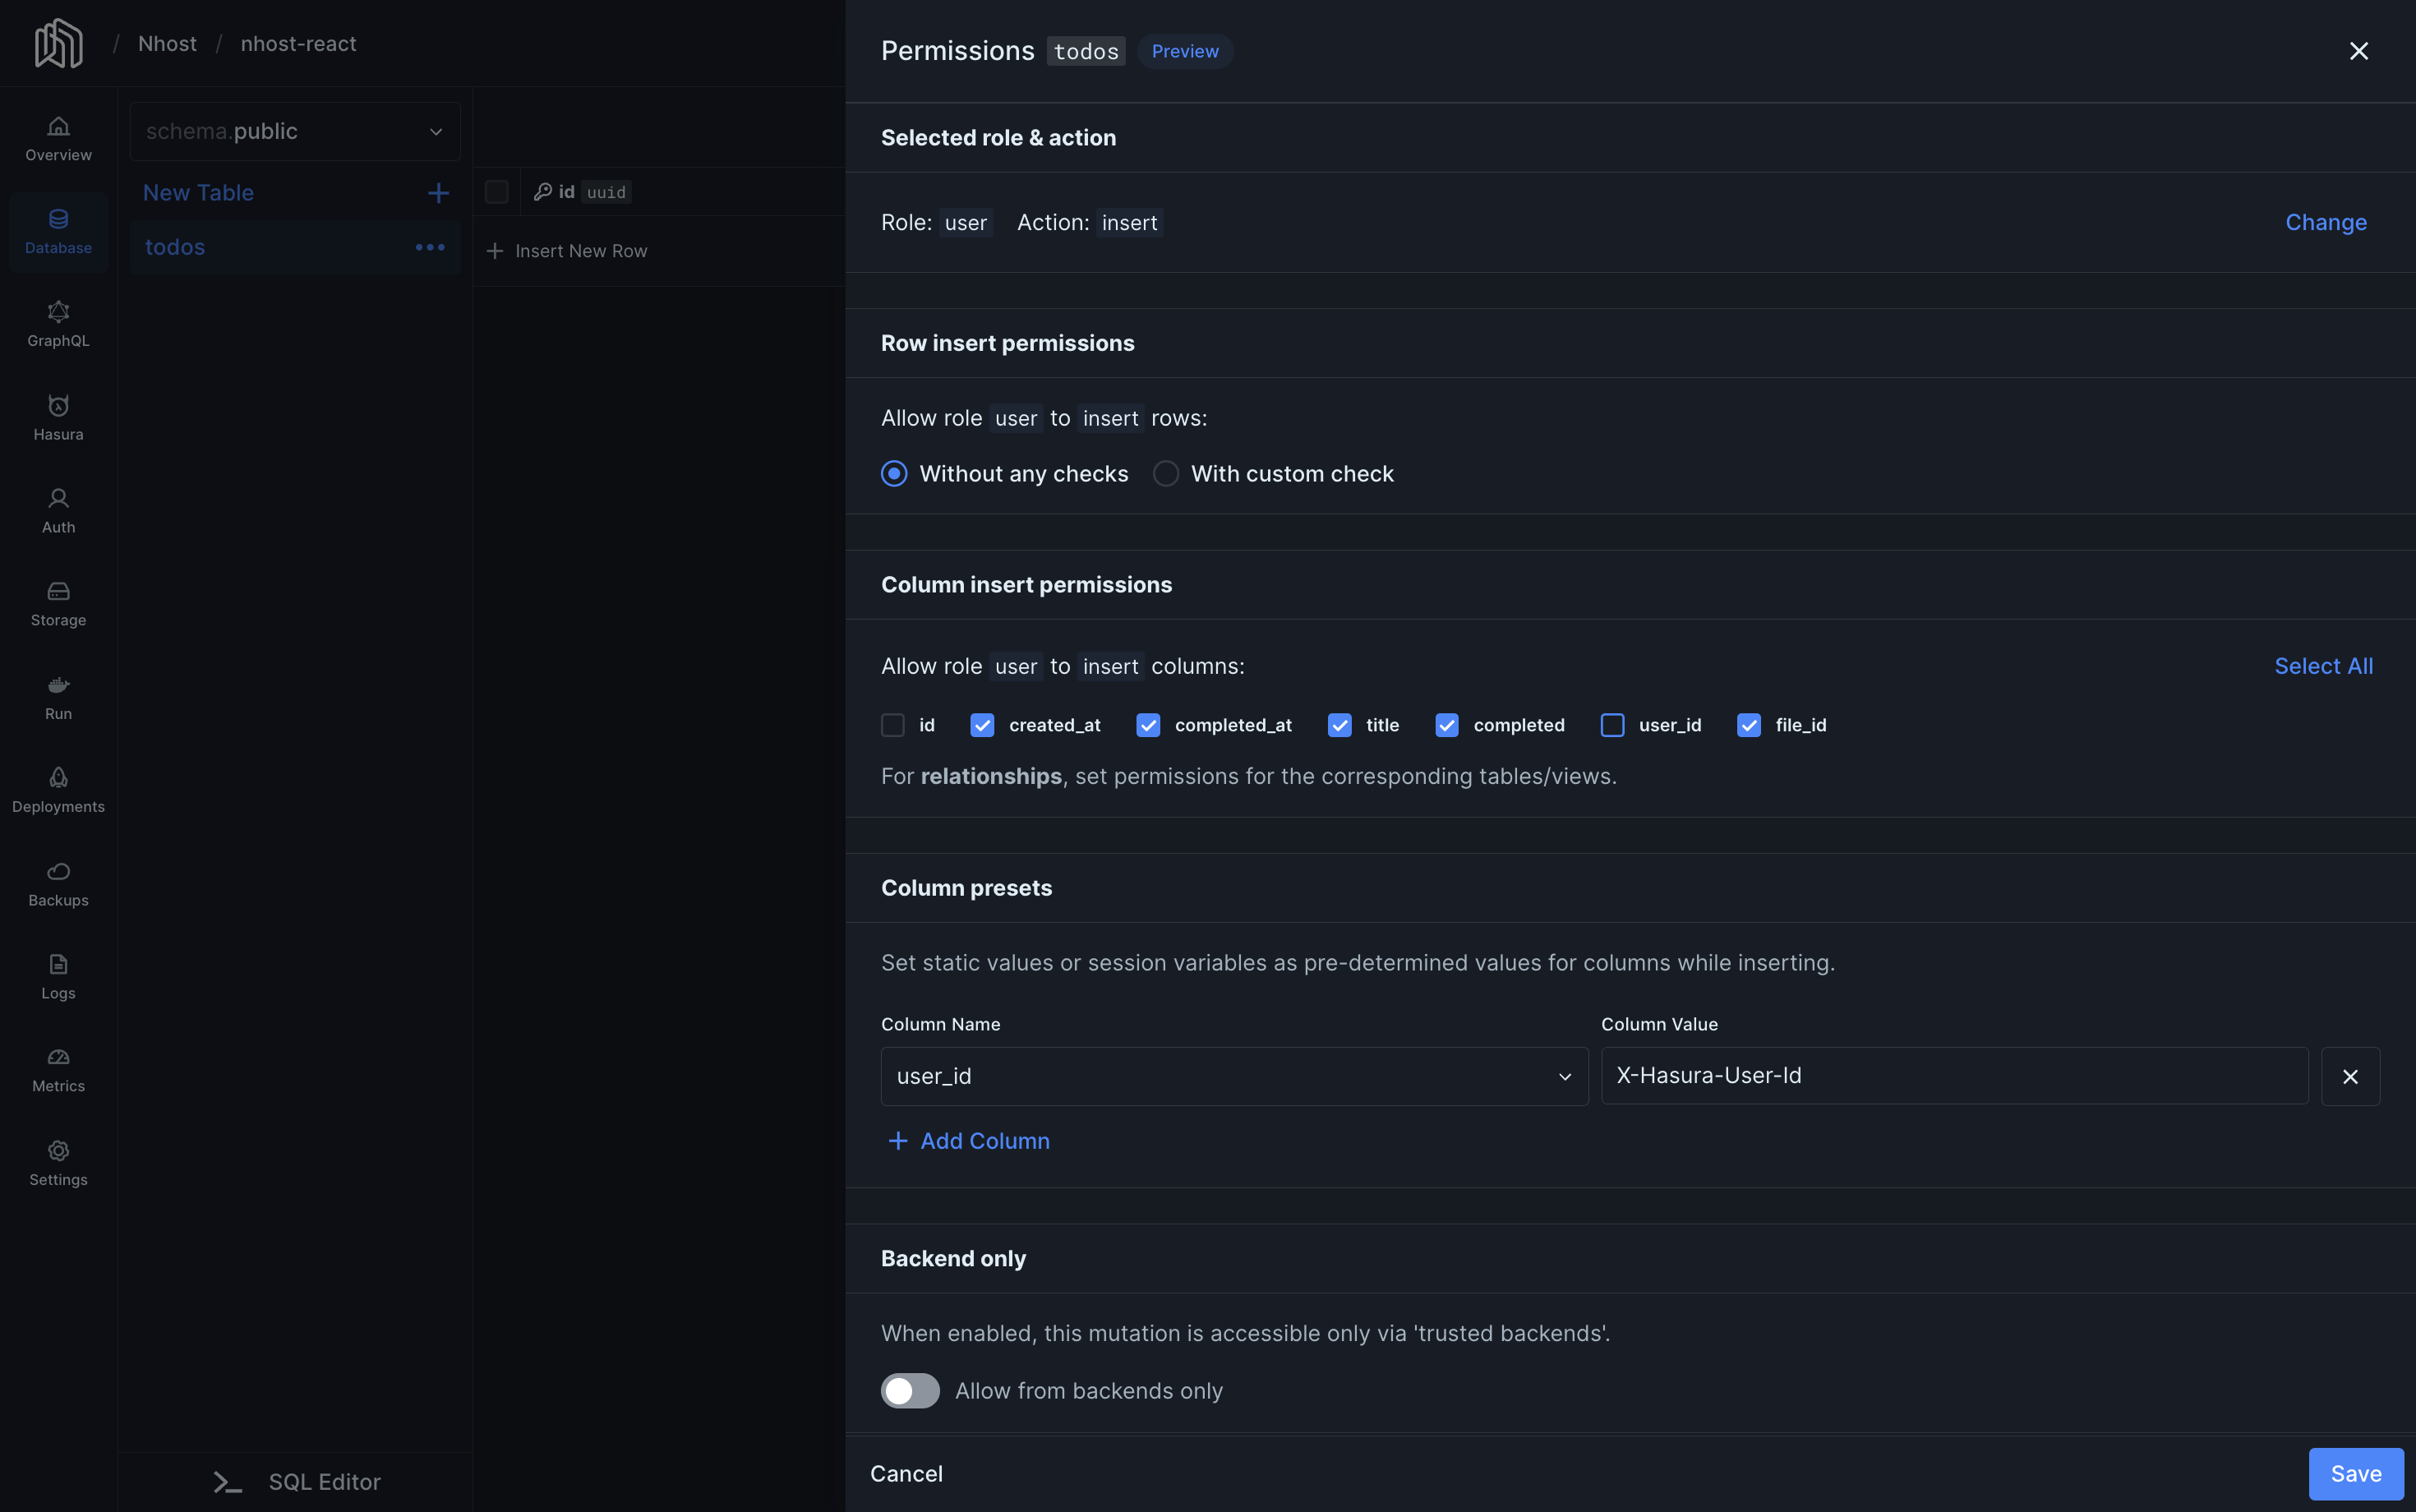
Here is a popular approach for insert permission for authenticated users.
- At the top of the page, click insert on the user role.
- Select Without any checks.
- Select the columns you want to allow users to insert. In our example, we do not mark
idnoruser_id, because they should not be inserted by the user. Theidis automatically generated by the database anduser_idis set using a column preset. - Under Column presets, set
user_idtox-hasura-user-id. This way, every new record’suser_idvalue is set to the ID of the user making the request.
Now, authenticated users are allowed to insert todos. Users are allowed to add a title when inserting a todo. The todo’s id is automatically generated by the database and the user_id is automatically set to the user’s id using the user_id = x-hasura-user-id column preset.
Select, Update and Delete Permissions
Section titled “Select, Update and Delete Permissions”Select, update, and delete permissions usually follow the same pattern. Here’s an example of how to add select permissions:
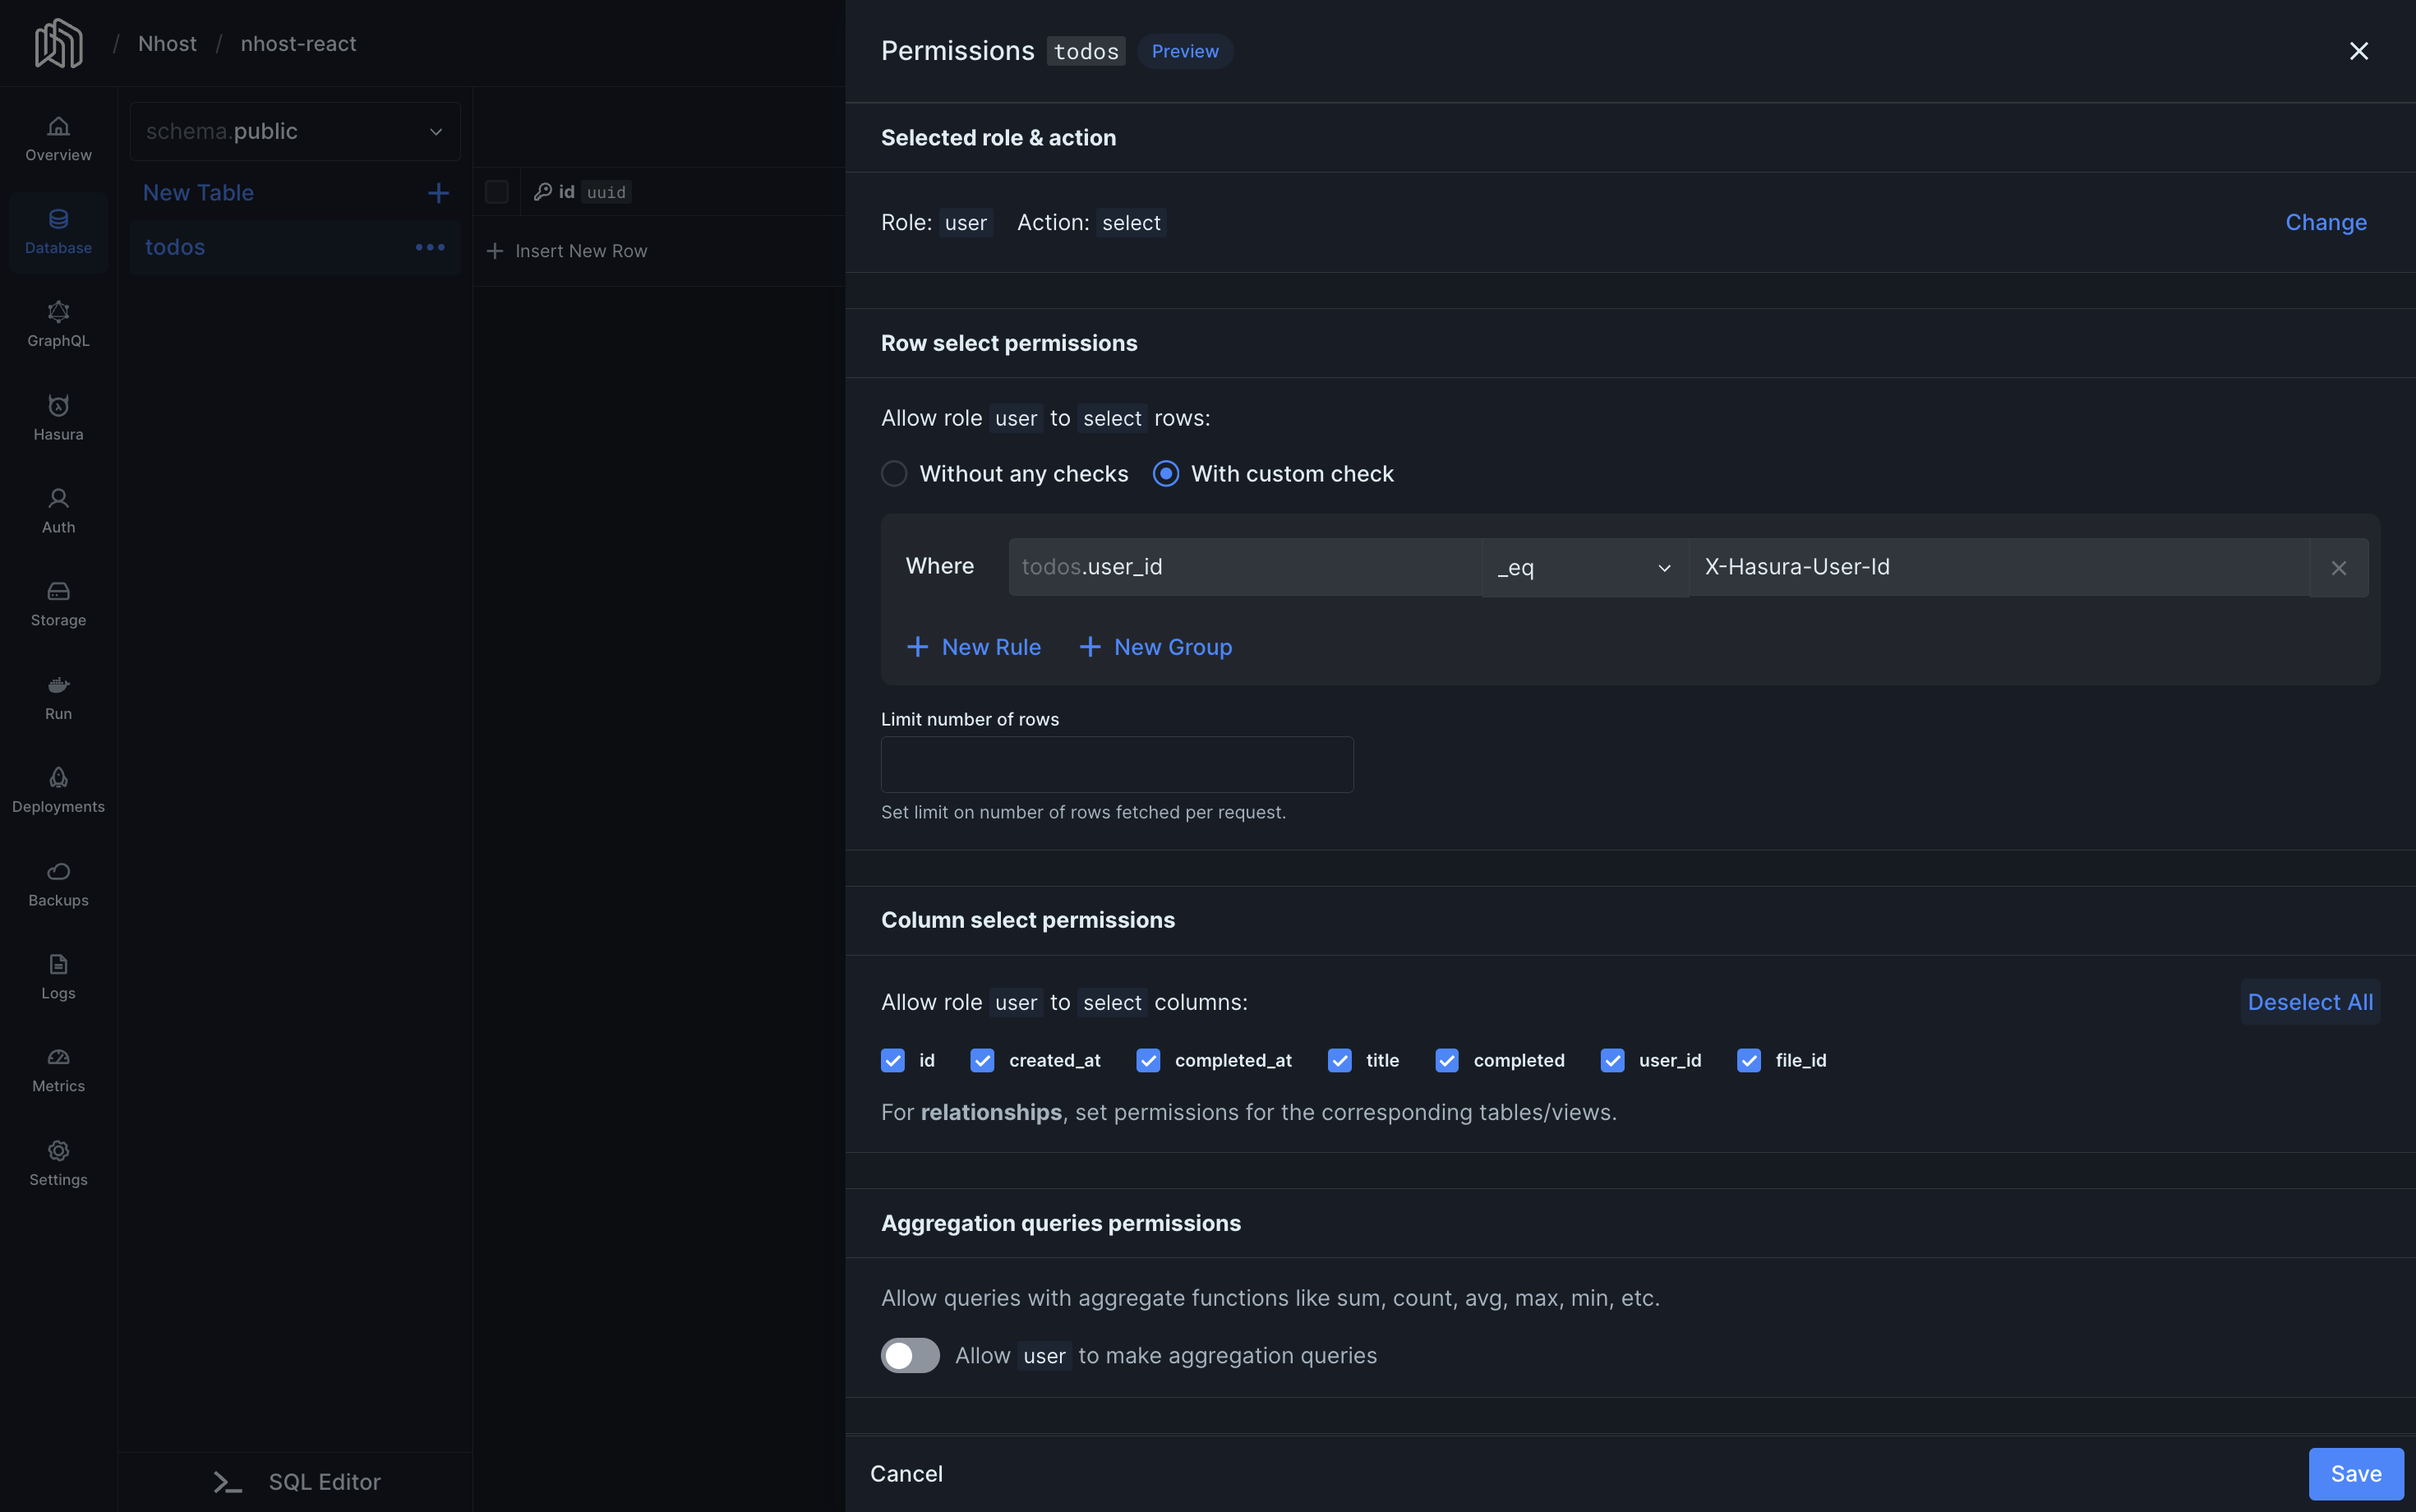
One of the most common permission requirements is that authenticated users should only be able to read their own data. This is how to do that:
- Go to the Database section in the Nhost Dashboard.
- In the context menu of the table you want to edit, click on Edit Permissions.
- Click on the role and operation you want to set.
- Select With custom check to create a new rule.
- Enter
user_id,_eqandx-hasura-user-idinto the rule form. This means that in order for users to read data, the user ID value in the database row must be the same as the user ID in the access token. - Limit the number of rows to 100 (or some other relevant number).
- Select the columns you want the user to be able to read. In our case, we’ll allow the user to read all columns.
- Click Save.
Action Permissions
Section titled “Action Permissions”Actions are permissioned per role too, but the rules are simpler: a role either can call the Action or it cannot. By default, only the admin role can.
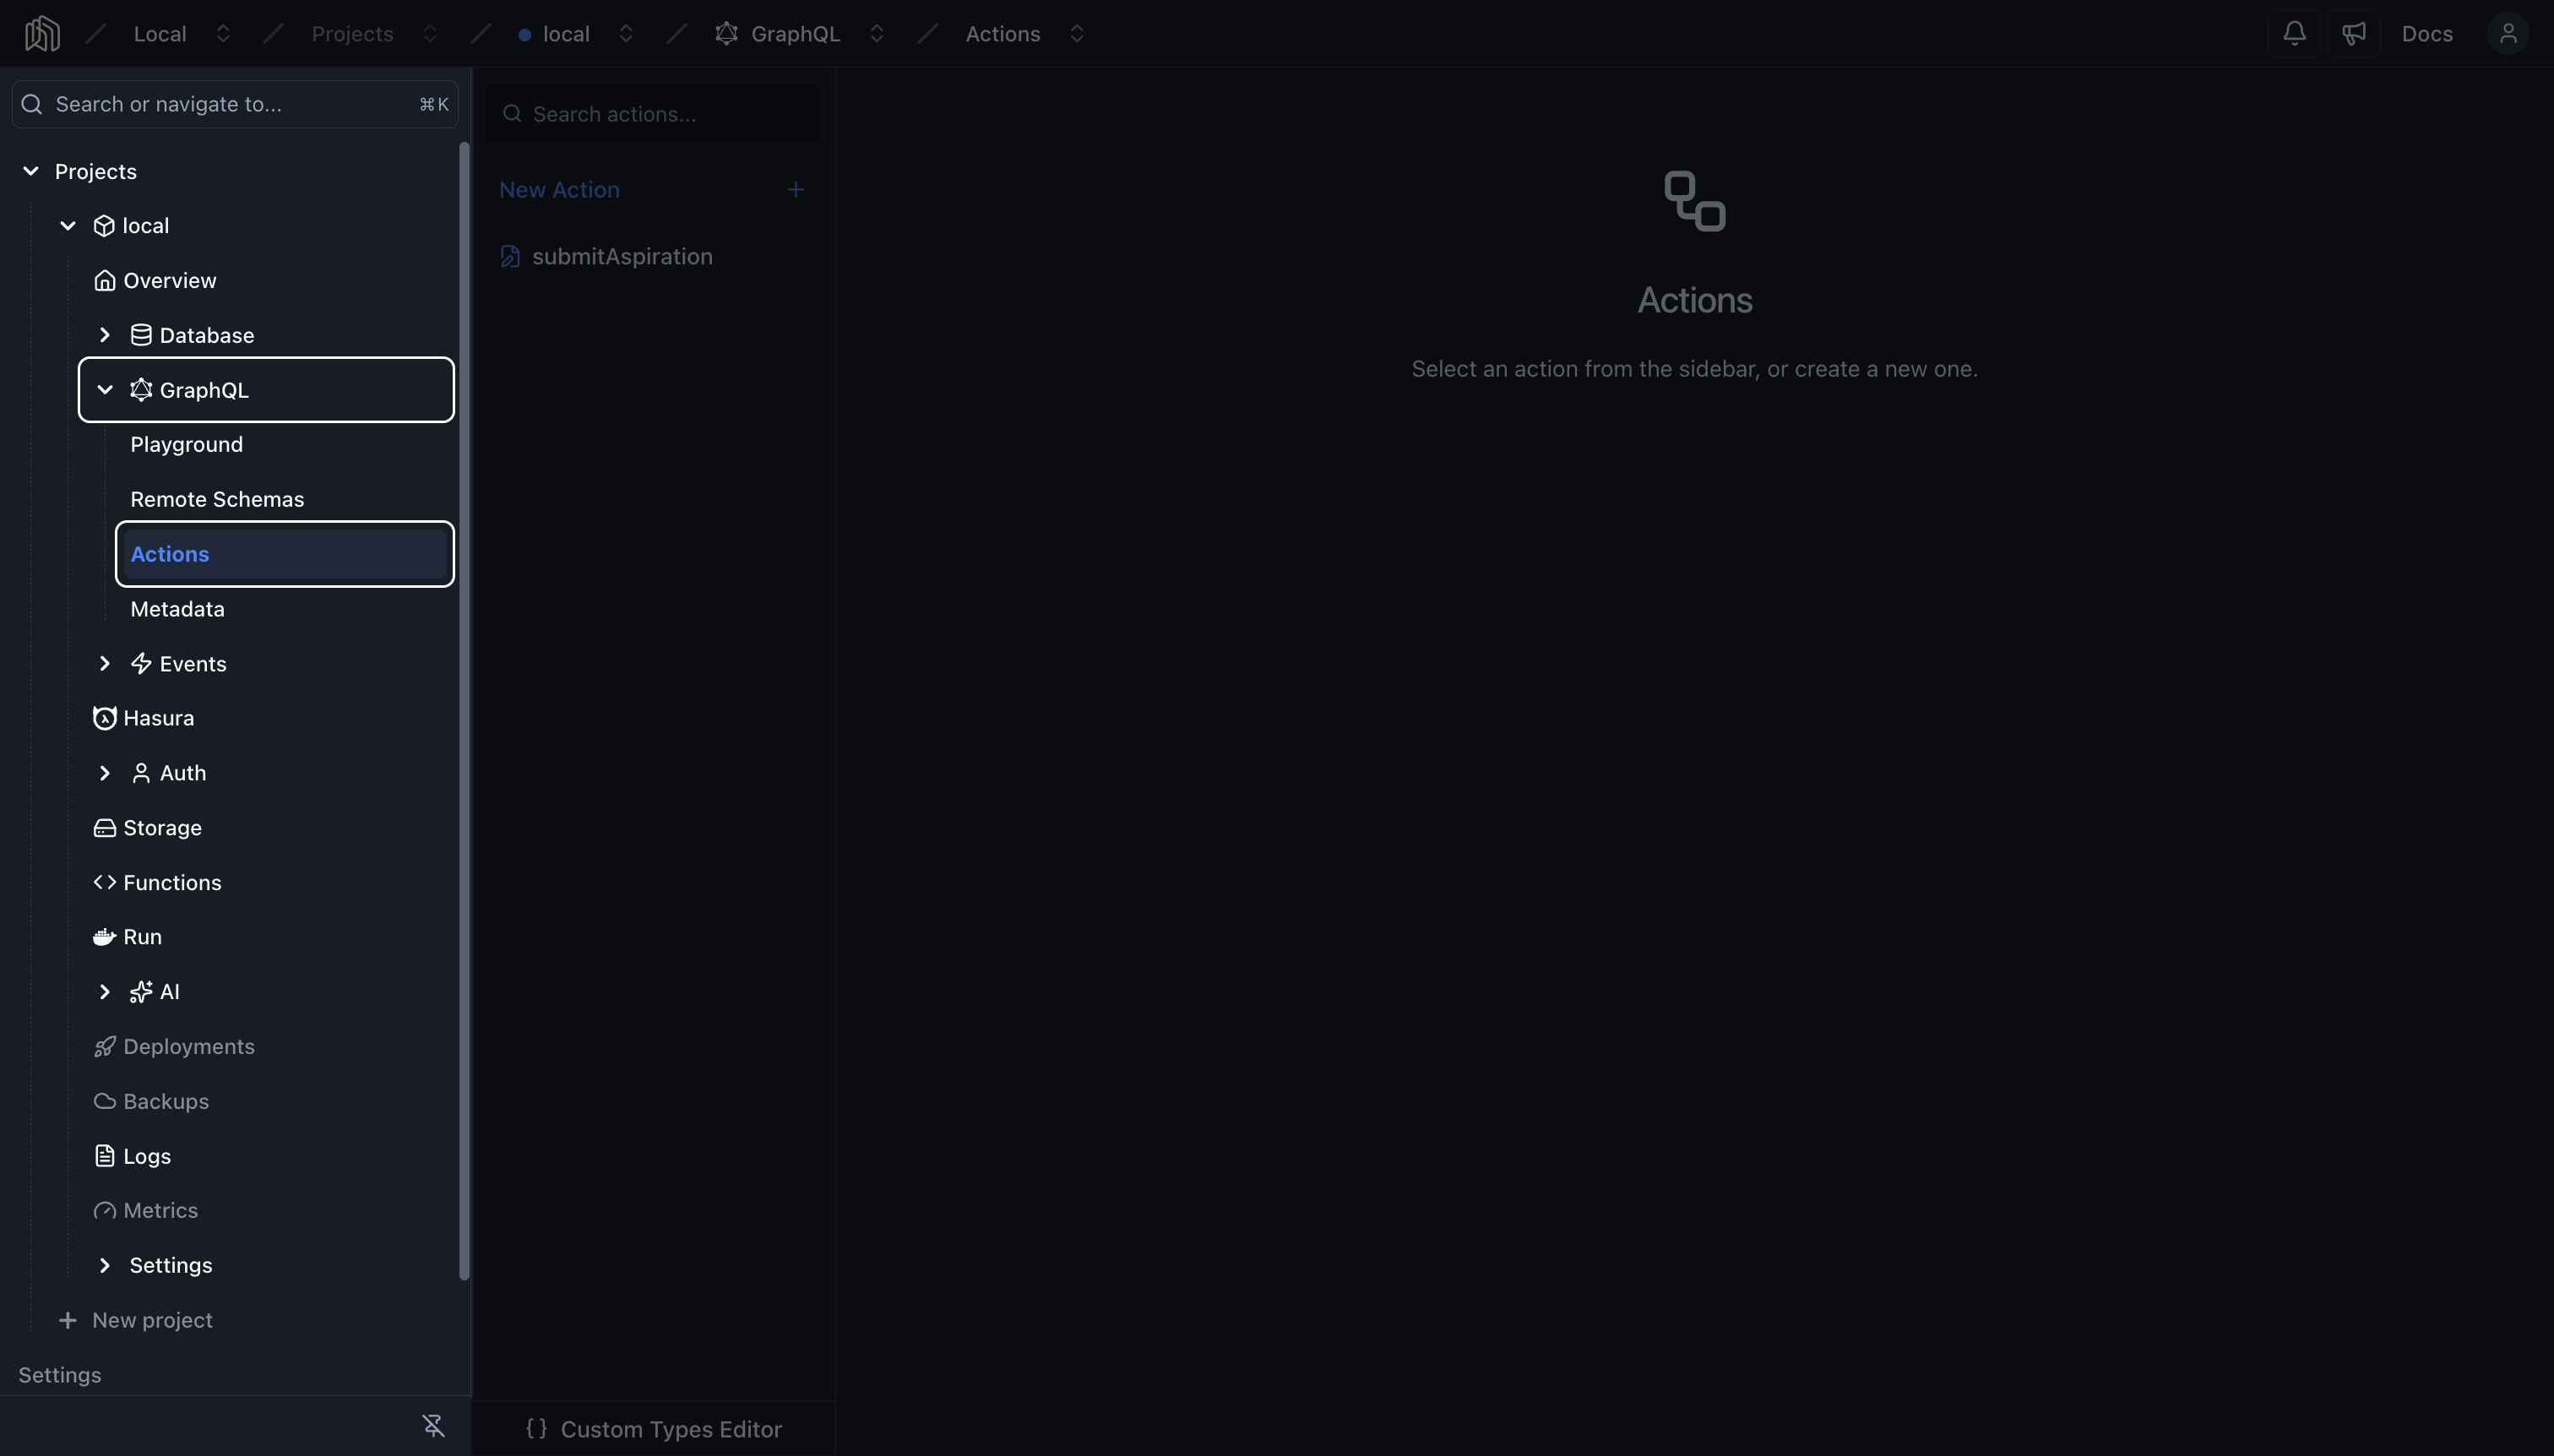
- Go to the GraphQL > Actions section in the Nhost Dashboard.
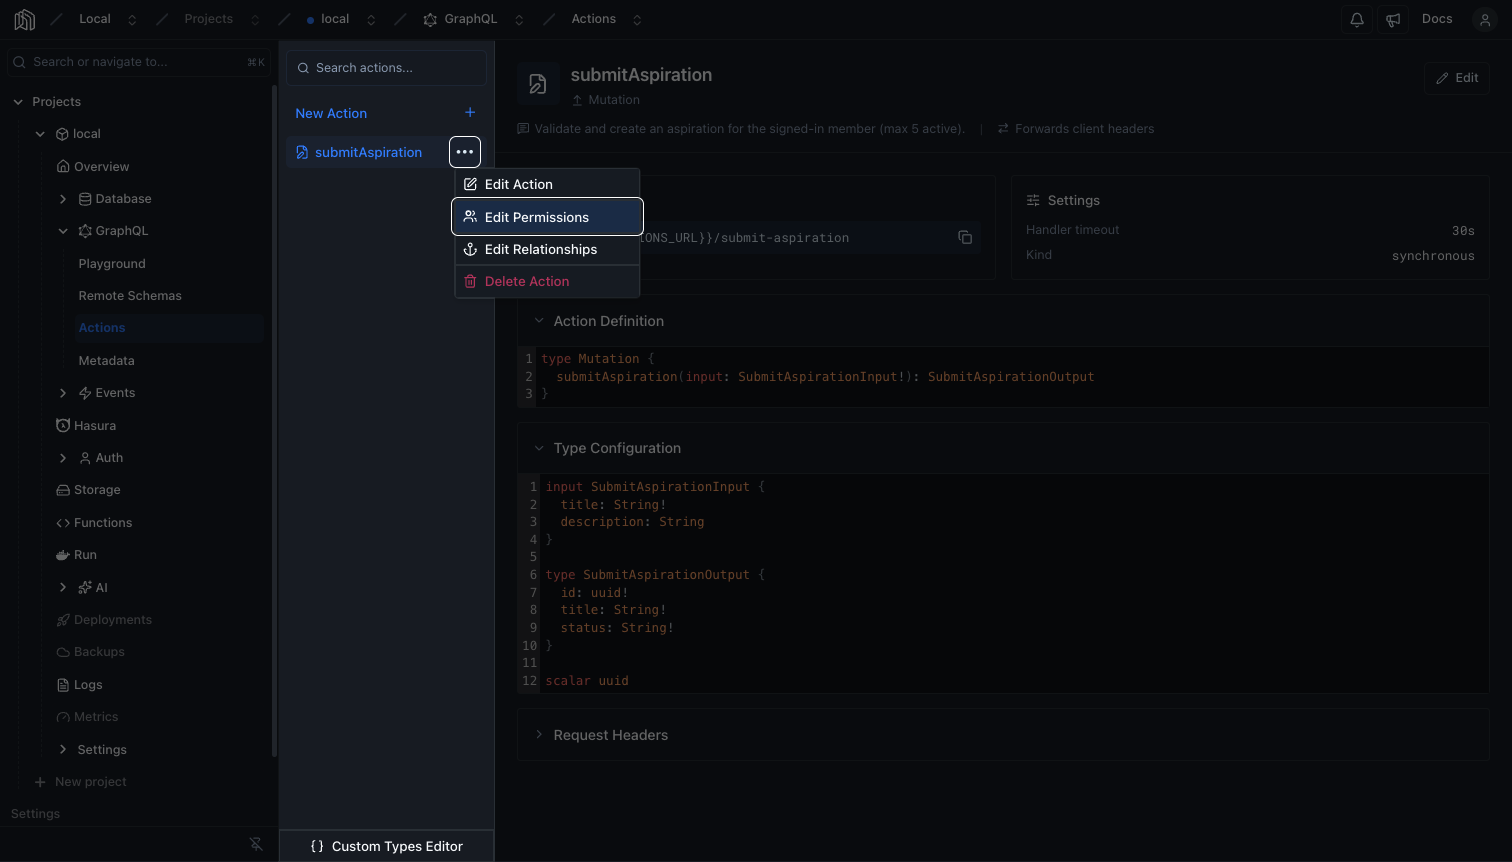
- In the
⋯menu of the Action you want to edit, click Edit Permissions.
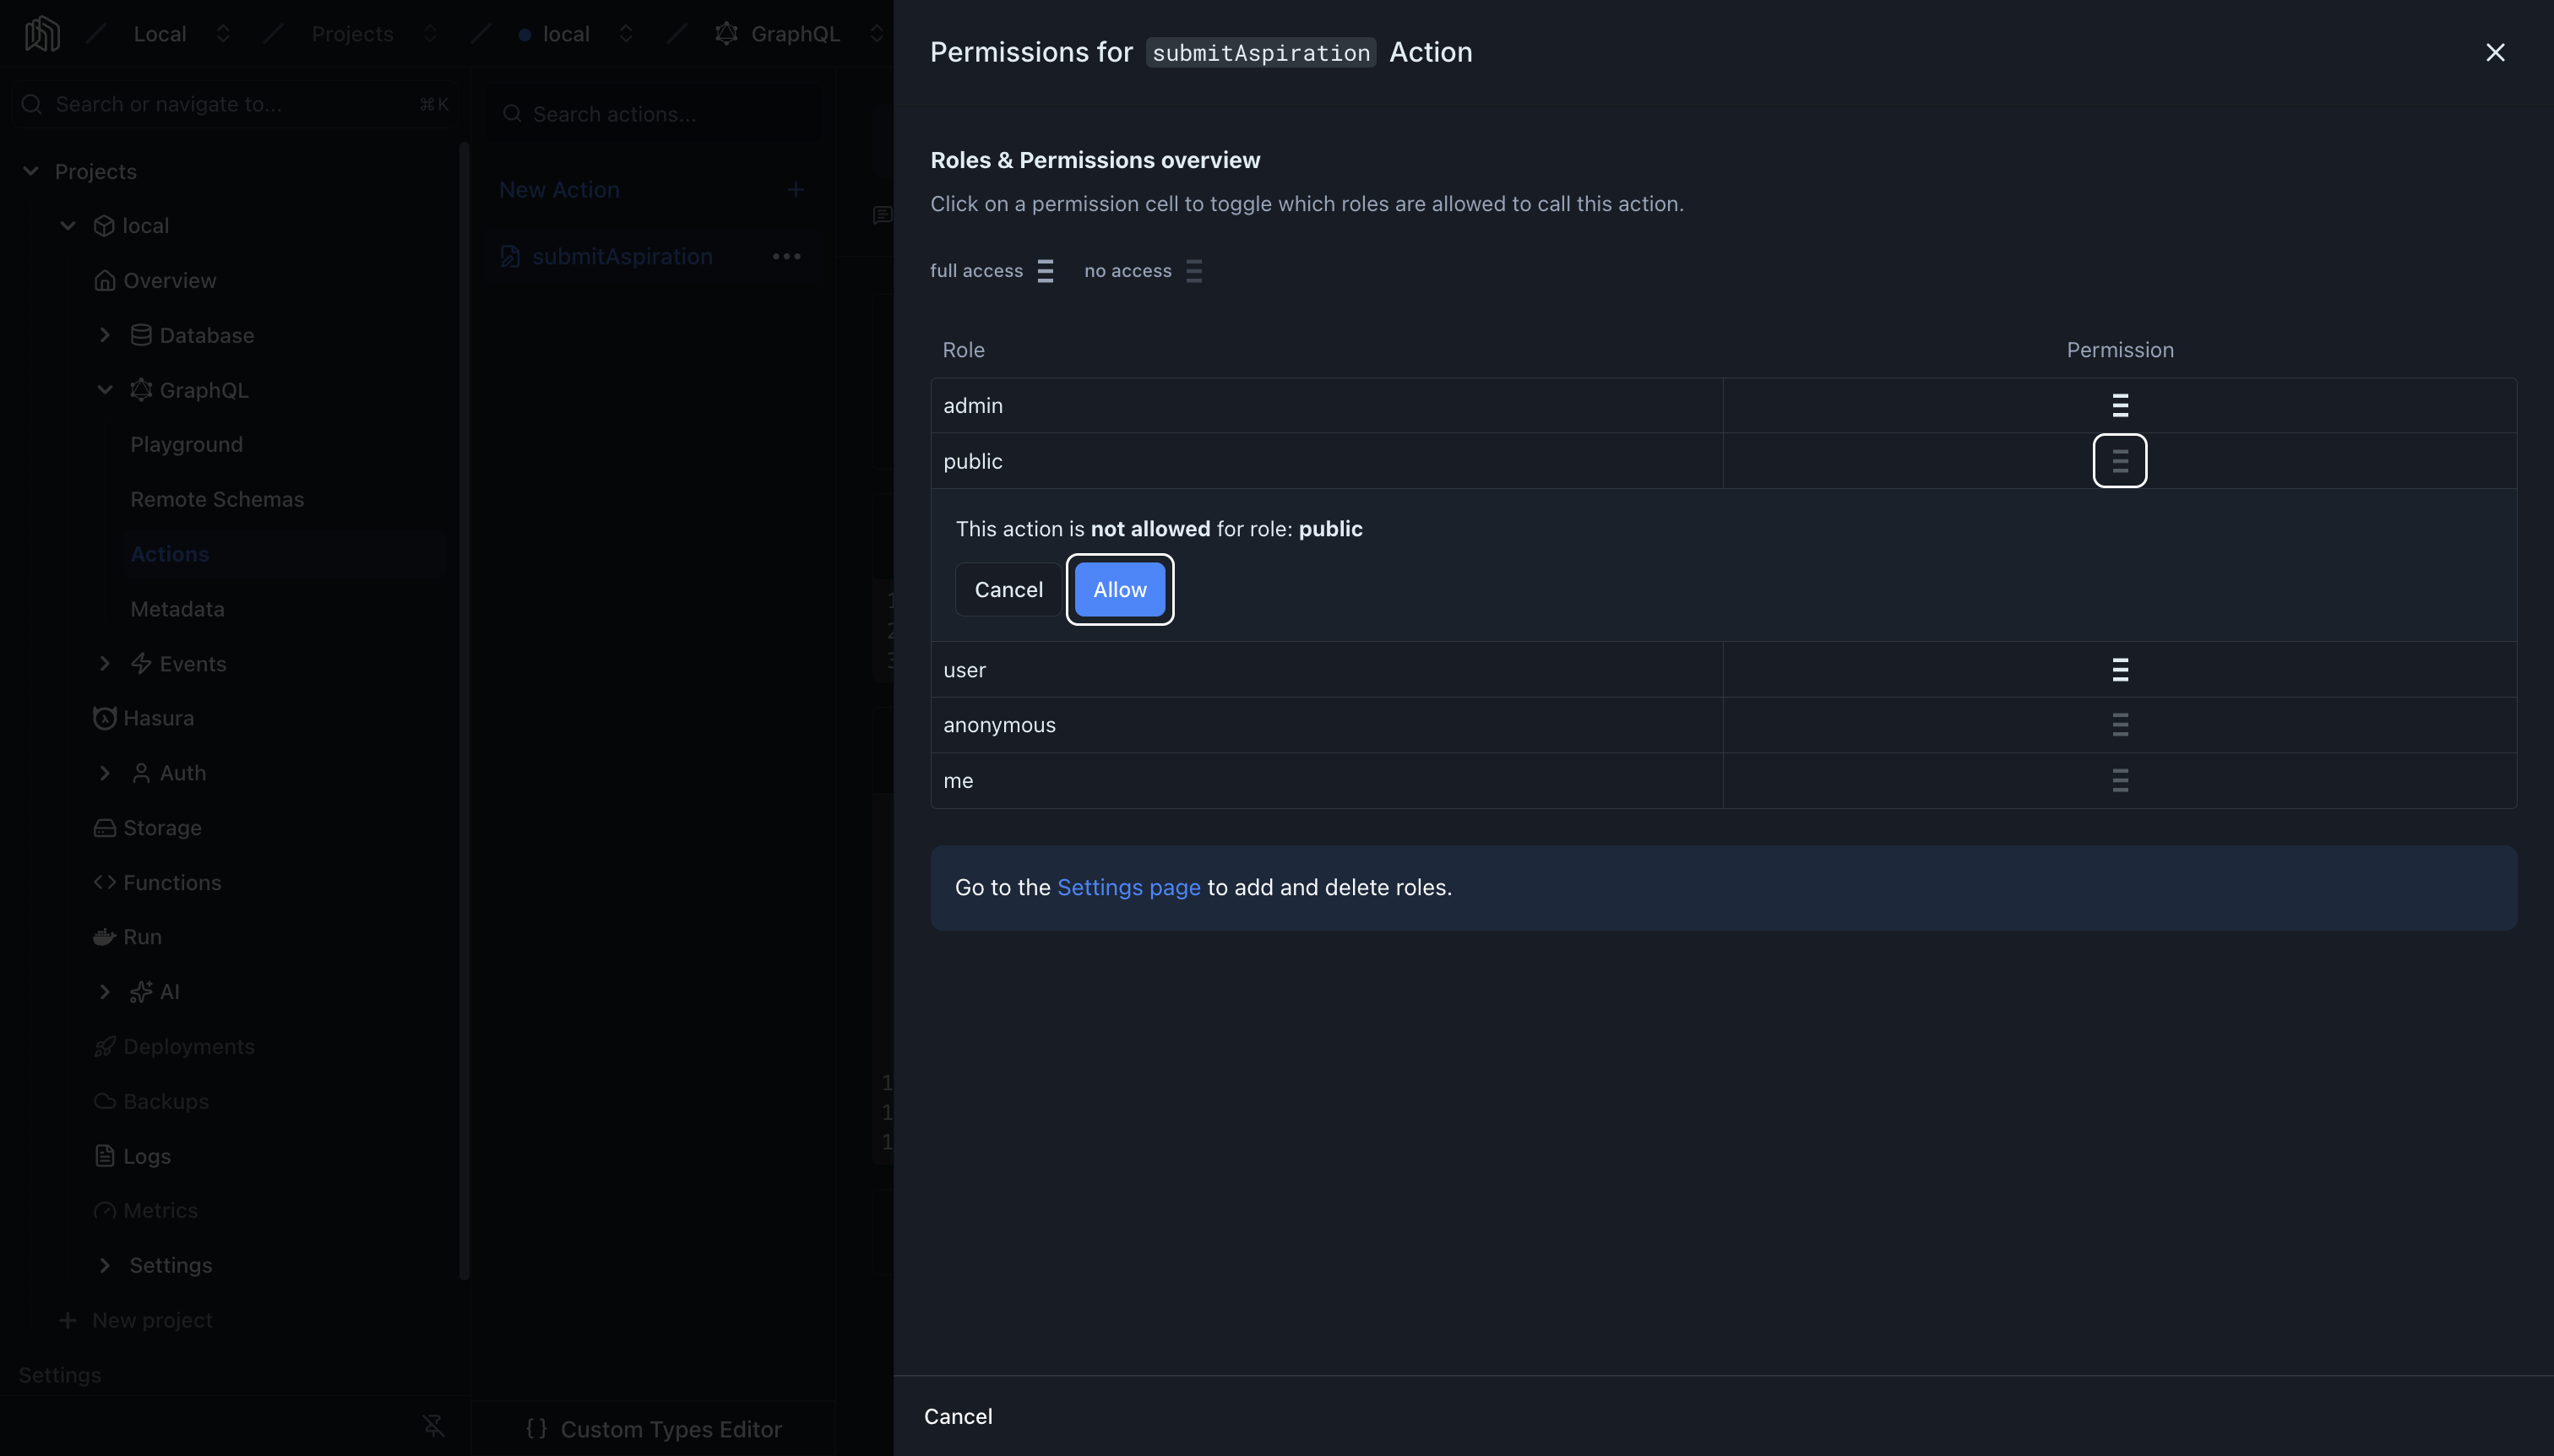
- Click a permission cell to toggle whether that role is allowed to call the Action.
- Click Allow.
The admin role is always allowed, and the public role is available for unauthenticated access. There are no column-level rules or row checks, because an Action resolves through your webhook rather than a table. Any filtering of what the caller may see belongs in the handler.
To add or remove the roles listed here, go to Auth > Settings > Roles and Permissions.